
Kawasak F5 and F9 Big Horn speed secrets
Performance mods and "hop up" tips
Below are scans of an article on how to make the Big Horn Hotter. Some of the tips and tricks outlined are obviously geared more to making the F5/F9 Big Horn into a flat track racer so not all of the techniques will apply to your F5/F9 Big Horn, also 30+ yeas of knowledge later has shown that some techniques are maybe a bit questionable. However it is a unique look back at some performance tricks for the Kawasaki Big Horn. Check out my videos for general performance tips and specific tips related to my performance F9 Big Horn build. Use the below information at your own risk. I also have all the information from the Factory "Speed Kit" on another page. It contains all the specs, parts, and instructions to modify your F5/F9 Big Horn.
Below is a playlist of my Vintage MX performance bike build
Below is a playlist of my Vintage MX performance bike build
[object Object]
|
Need to replace that leaking vacuum operated fuel tap (petcock) on your Big Horn (350cc), Bison (250cc), F7 (175cc)?
Try this replacement fuel tap that fits 1975-present Harley Davidson Sportsers HD p/n 62163 OR Biker's Choice p/n 49-2599 it has a straight outlet and features 22MM threads that fit any tank with 22MM threading. This will fit F5,F9 and F7 (175cc). Can be found on Ebay and various sources. 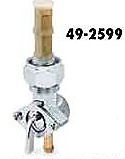
Suitable replacement fuel cock for the Big Horn (F5,F9, will fit F7)
Making your Big Horn hotter
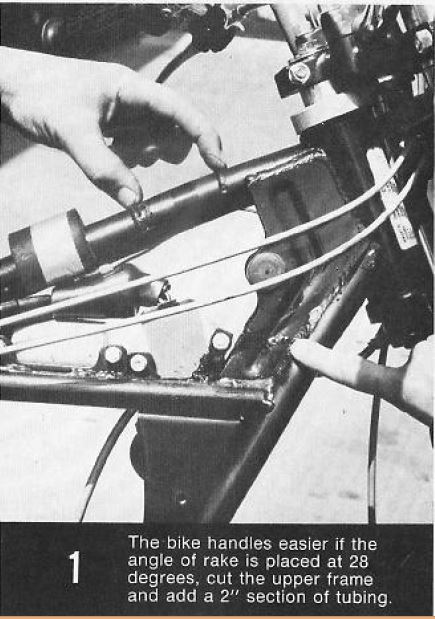
Improving the F9 Big Horn's handling
1. The bike handles easier if the angle of the rake is placed at 28 degrees, cut the upper frame and a 2 inch section of tubing.
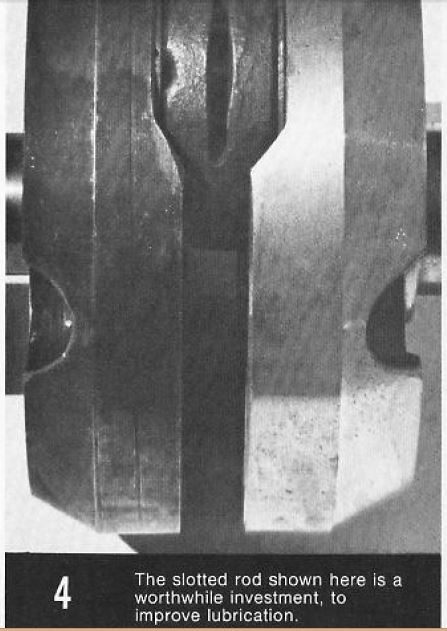
Improving the lubrication to the big end bearing on the F9 crankshaft
4. The slotted rod show here is a worthwhile investment to improve lubrication. (for high RPM use)
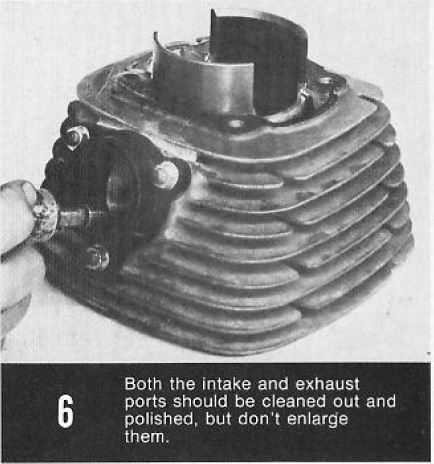
Cleaning up the cylinder ports will help flow
6. Both the intake and exhaust ports should be cleaned out and polished, but don't enlarge them.
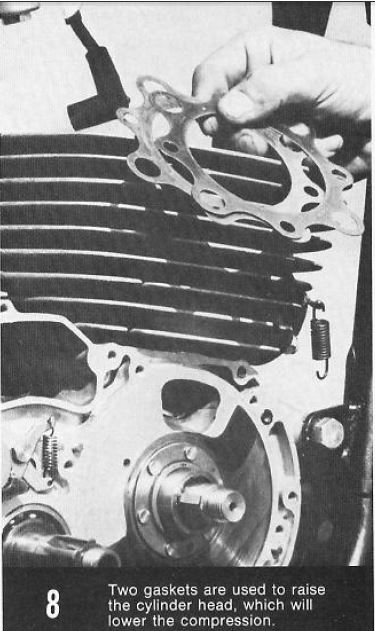
8. Two gaskets are used to raise the cylinder head, which will lower the compression. *This is another idea that is questionable, as using two or three gaskets will lower compression and help prevent detonation, however it still doesn't fix the issue of the head not having a proper squish band. Klemm Vintage has a good picture of this on his website.
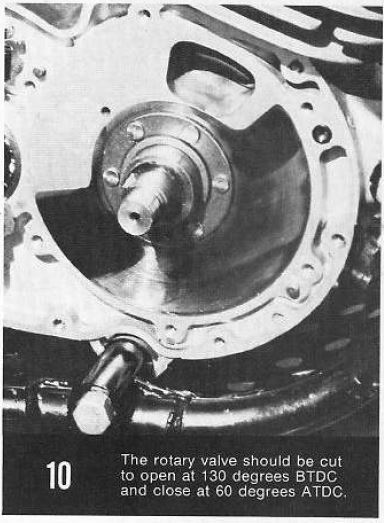
See Speed Kit manual for exact specs and how to cut the valve
10. The rotary valve should be cut to open at 130 degrees BTDC and close at 60 degrees ATDC *Speed Kit specs
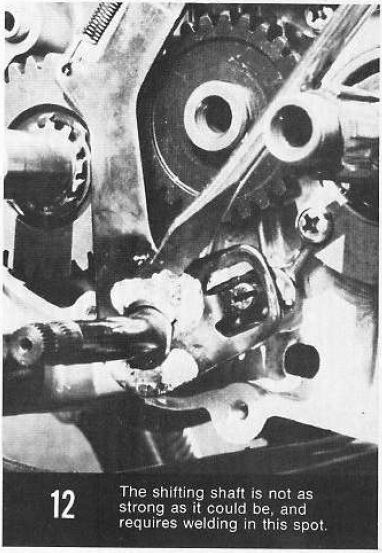
More of a quality control issue here, check yours and weld if needed
12. The shifting shaft is not as strong as it could be an requires welding in this spot.
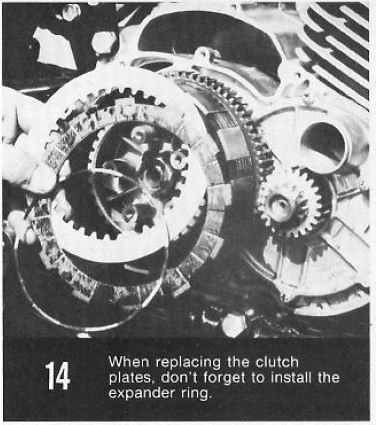
F9 clutch replacement uses expander rings which is somewhat unusual
14. When replacing the clutch plates, don't forget to install the expander ring.
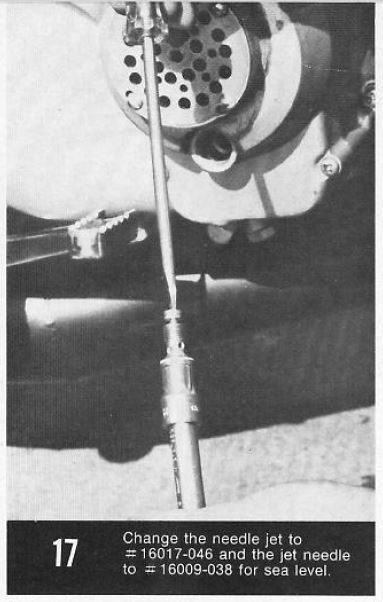
17. Change the needle jet to p/n 16017-046 and the jet needle to 16009-038 for sea level. *Follow my videos for jetting tips. Each situation will be different.
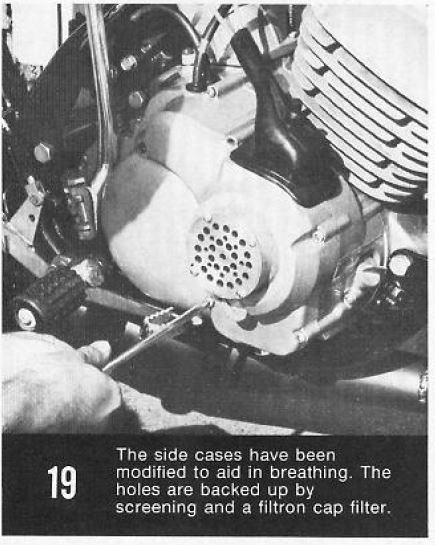
19. The side cases have been modified to aid in breathing, The holes are backed up by screening and a filtron cap filter. *I am not sure what a "filtron cap filter" is, but find the carburetor cover intake for an F81M or p/n's 14065-003, 14063-002, 92065-074 or make a filter out of bulk filter material
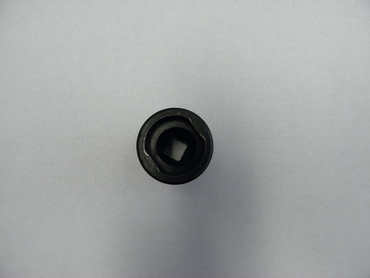
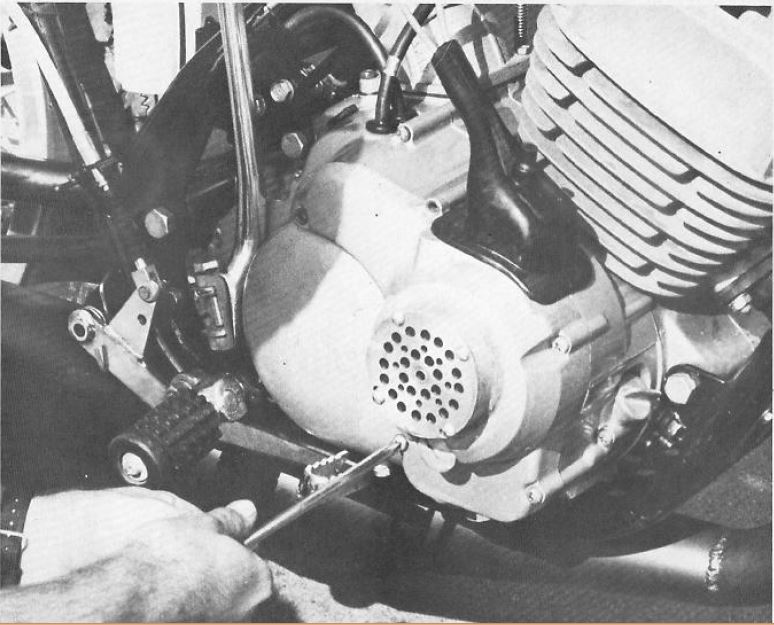
Special socket required to remove the oil pump pinion gear/nut on the F5 F8 and F9
|
Below are pictures of the rare F81M button mag, magneto and lightweight flywheel setup that came stock on the Kawasaki F81M (250cc). This is/was a popular upgrade from the heavy stock F5/F9 flywheel (almost 3 lbs!) This will really make your F5/F9 (350cc) spin up quicker. This also fits the F11M.

Making the Big Horn Hotter page 1
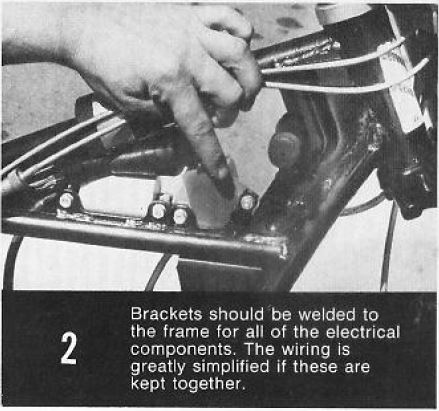
Simplifying the Big Horn's wiring for racing
2. Brackets should be welded to the frame for all of the electrical components. The wiring is greatly simplified if these are kept together.
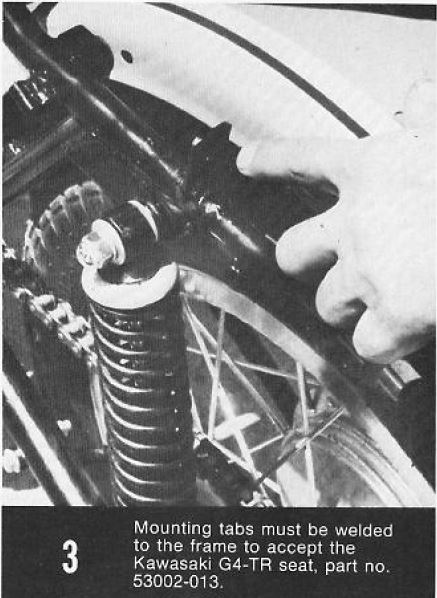
Improving the seat on the Big Horn for racing as the stock F9 seat is hinged and uses the ignition key to latch and lock it down which is unnecessary for a racing machine.
3. Mounting tabs must be welded to the frame. Replace seat with a GT4TR seat part number 53002-013
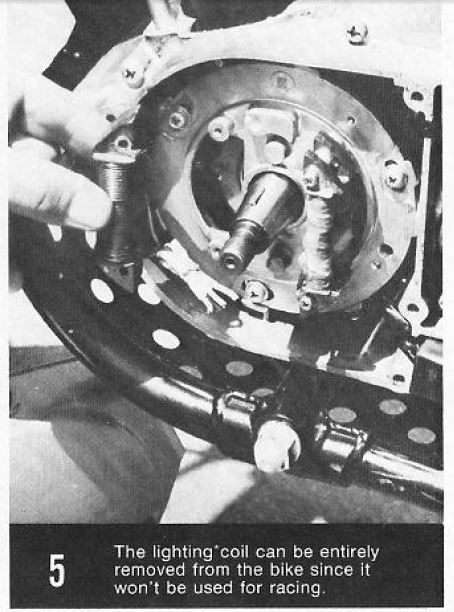
The lighting coil can be removed for racing and simplifying the wiring on the F9
5. The lighting coil can be entirely removed from the bike since it won't be used for racing.
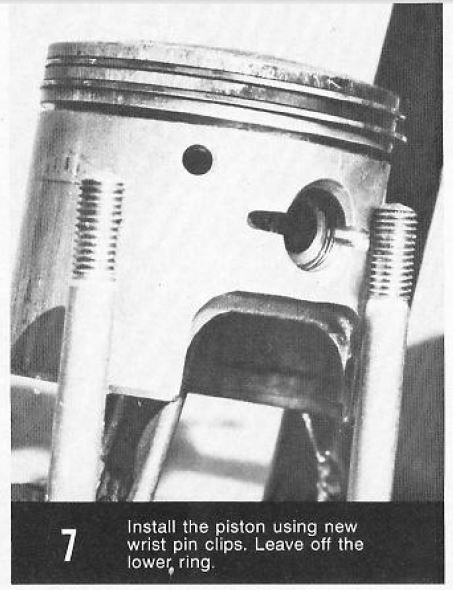
7. Install the piston using new wrist pin clips. Leave off the lower ring. *There is conflicting opinions on if this is a good idea from a performance and reliability standpoint, remove piston ring at your own risk. Some people will argue that the ring groove will alter exhaust port timing and or disrupt flow. However others will dis-agree stating that the 3rd ring only adds weight and friction and is not needed, a valid argument. The factory service manual states the reasoning for the 3rd ring is for heat transfer and cooling. The "Speed Kit" piston only has 2 rings but is of a slightly different design and is lighter, which begs the question why the "speed kit" piston didn't become standard equipment in the later F5A and F9? This suggests a possibly long term reliability issue in a non racing application.
Using a different spark plug is a good idea
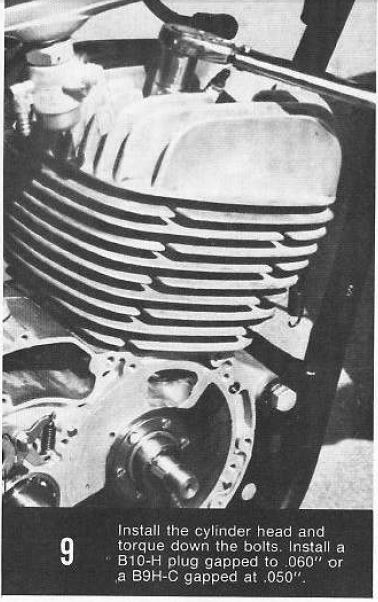
9. Install the cylinder head and torque down the bolts. Install (NGK) B10-H plug gapped to .060in or a D9H-C gapped to .050in
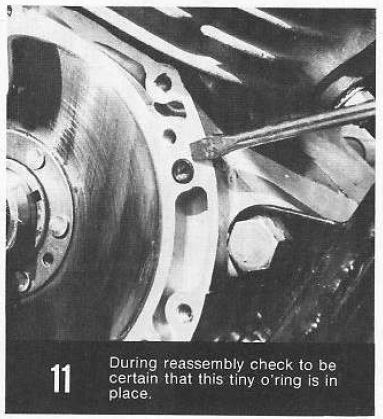
This is more a general tip on reassembly
11. During reassembly check to be certain that this tiny o-ring is in place.
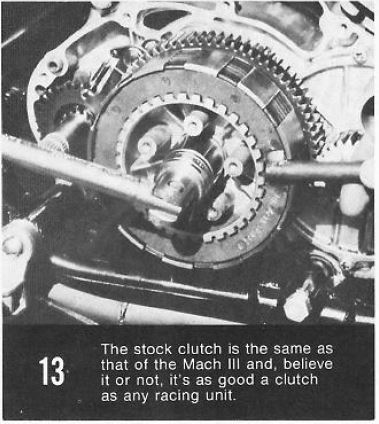
The F9 clutch, follow the tips in my videos to improve the clutch (see the video pages)
13. The stock clutch is the same as that of the Mach III (H1 triple) and believe it or not, it's as good a clutch as any racing unit.
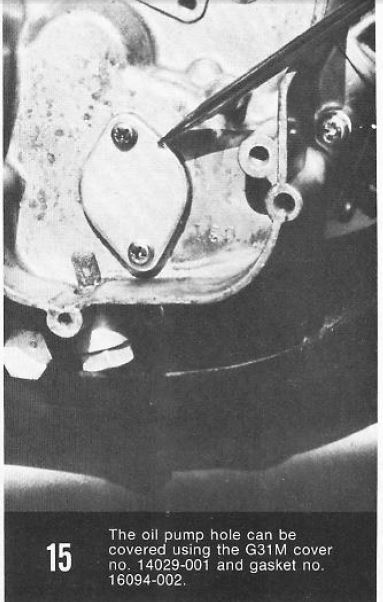
15. The oil pump hole can be covered using the G31M cover p/n 14029-001 and gasket 16094-02 *Good luck finding those parts today, however... Another debatable technique, personally I would still run the oil pump. The Speed Kit manual recommends unhooking the cable to the pump but still using the oil pump and mixing at 15:1
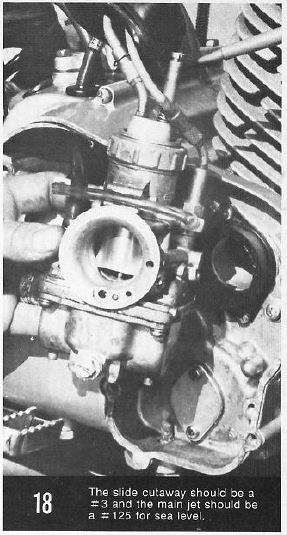
18. The slide cutaway should be a #3 and the main jet should be a # 125 for sea level *Jetting will vary by altitude
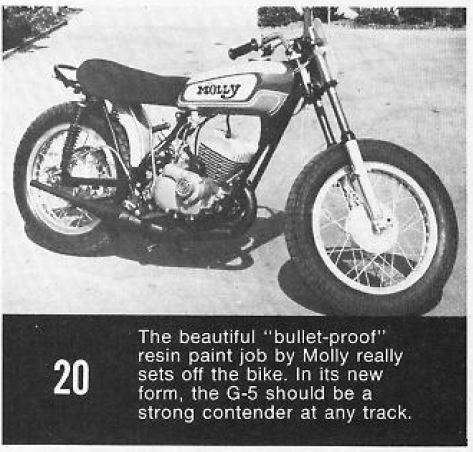
"Molly" sure looks like a decent flat tracker and it would be nice to know what exhaust is on that bike. Use the information above at your own risk.
|