
Barn Fresh episode 6 Fuel and ignition diagnosis
Episode 6 continues the restoration of the 1970 Kawasaki F5 350cc Big Horn diving into the fuel and ignition systems. In this episode you will see the inner workings of the carburetor that is unique to this bike as well as how to diagnose some common problems. Also in this video the CDI ignition system is explained as to how it works and an in depth procedure is shown on how to test the primary and exciter coils to determine if they are working properly or need replaced. The parts are replaced as needed and the engine is started for the first time. For more information on how to build the auxiliary fuel tank seen in this video to ease tuning without having to install the the factory tank can be seen in this video. Building an auxiliary fuel tank Ignition specs and timing procedures can be found on the service manual page.
Click here for episode 7
|
Need to replace that leaking vacuum operated fuel tap (petcock) on your Big Horn or Bison? Try this replacement fuel tap that fits 1975-present Harley Davidson Sportsers HD p/n 62163 OR Biker's Choice p/n 49-2599 it has a straight outlet and features 22MM threads that fit any tank with 22MM threading. This will fit F5,F9 and F7 (175cc). Can be found on Ebay and various sources.
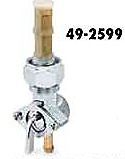
Replacement non vacuum type petcock that fits F5/F9 F8 and any other tank that has 22mm threads
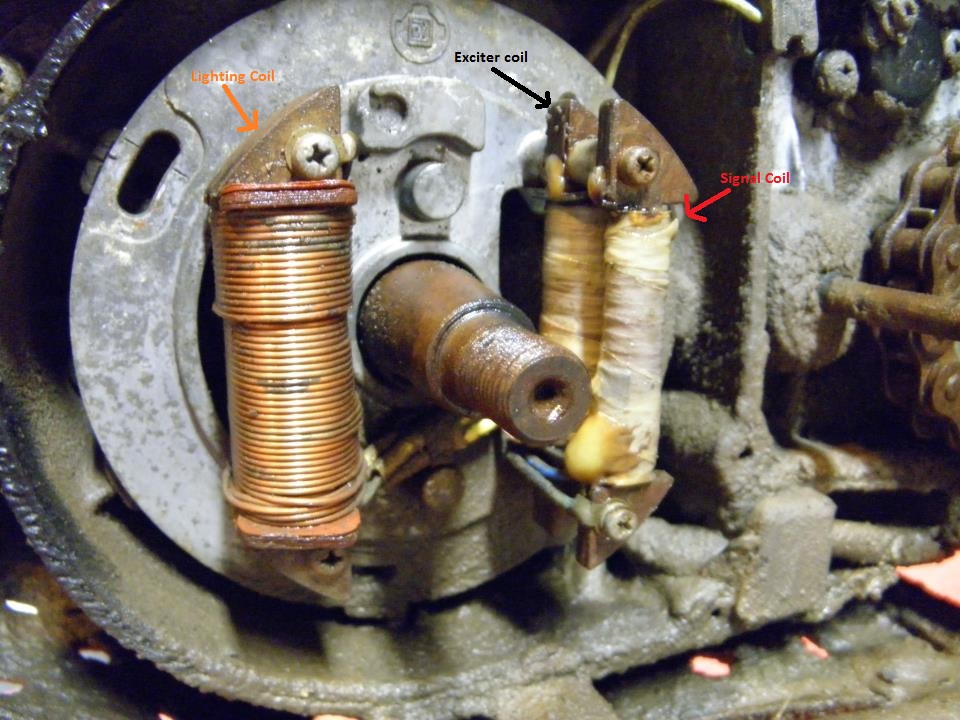
Kawasaki F5, F9, F8, F7 CDI ignition coils behind flywheel
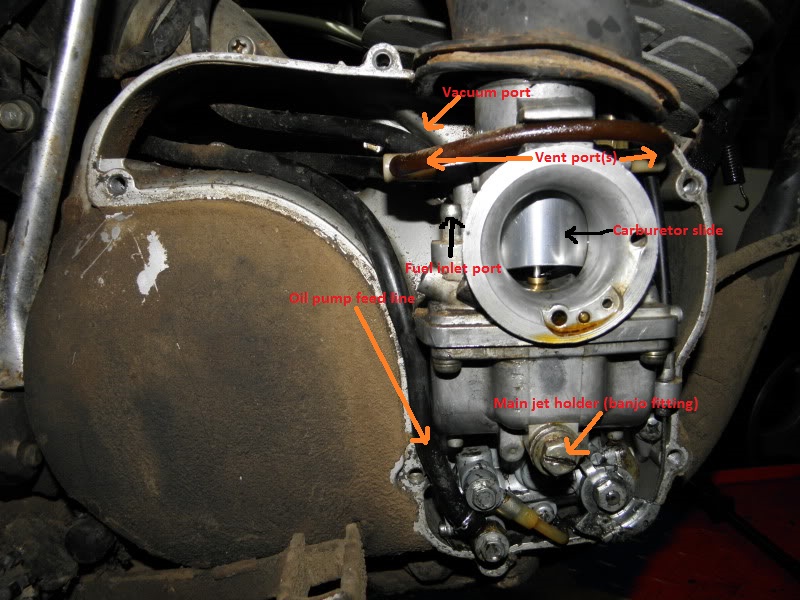
Pre-dissasembly picture of a Kawasaki F5 Big Horn carburetor with labels. Carburetor cover is removed.
|
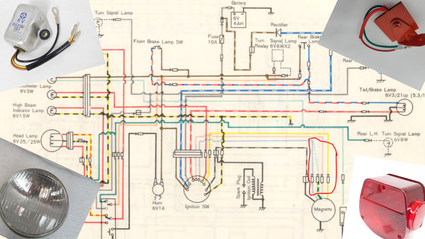
Specifications and instructions on how to test this ignition system can be found in the video and on the Repair/Service manual page. There is no way to test the CDI "box" on these bikes (they are fairly reliable). Typically ignition problems require testing the exciter and signal coils to see if they are in specified range. Typically a "no spark" situation can be narrowed down by testing these coils to verify they are in good enough shape to create the voltages needed to create a spark and fire the high tension ignition coil. The Lighting/Charging coil has nothing to do with the ignition system. This is a picture of the F5 CDI system which is similar to the F7 as well.
Below are some pictures of a dissembled F5 Big Horn carburetor which is similar in design that is found on most other rotary valve 2 stroke engines. Kawasaki changed the design slightly for the F9 Big Horn. The biggest difference to this carb versus typical piston port 2 stroke carburetors is that the main jet is located on a banjo bolt and requires an o-ring to seal the main jet chamber to supply fuel to the needle jet passage. Otherwise the operation and adjustment is the same as any other carburetor. You can find the carburetor settings for the F5, F9, F6, F7, G series, M series on the Service manual page. 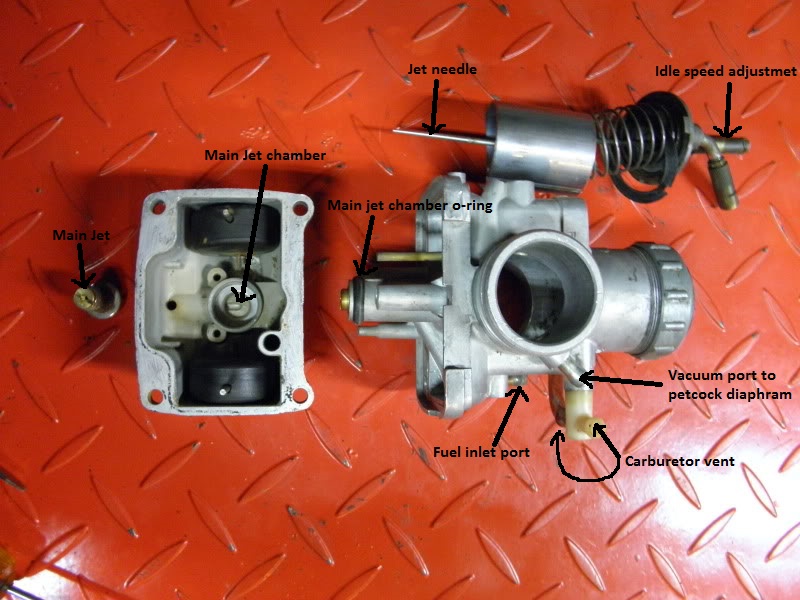
Kawasaki F5 Carburetor disassembled with parts labeled, the design is similar to most rotary valve engines (F6, F7, F8, F81M, F9, G series, M series, KE series)
Electrical (charging & lighting) system diagnosis
|