
GM Ignition Switch Replacement
If you have read about the GM Ignition switch recall 14350. Then you know that it does nothing with replacing the switch itself. In this post I will walk you through the steps needed to access and replace the faulty ignition switch that commonly wears out due to age and use.
The worn out switch can cause a few problems, most notably a no start or intermittent start condition. The intermittent start condition is when sometimes it takes a few turns of the key for the switch to make good enough contact to then activate the starter. The no start condition usually is a result of the worn contacts in the switch causing an interruption of the communication between the BCM (body control module) and the PCM (power-train control module). This communication check is part of the Pass Lock system that controls the Anit-Theft system in which it disables the fuel pump relay and the starter relay to prevent theft. However sometimes a faulty ignition switch can cause a false positive for the Pass Lock anti theft system. For a details on how to reset the Pass Lock see the end of this post. However if you came here to replace your ignition switch on your GM vehicle, watch the video below as well as the pictures on how to remove the dash components to access the switch mechanism. This ignition switch replacement applies to the following vehicles as they use the same switch part number. CHEVROLETIMPALA 2000-2005 CHEVROLETMALIBU 1997-2001 CHEVROLETMONTE CARLO 2000-2005 OLDSMOBILEALERO 1999-2001 OLDSMOBILECUTLASS 1997-1999 OLDSMOBILEINTRIGUE 1998-2002 PONTIACGRAND AM 1999-2001
Affiliate Link that supports the site
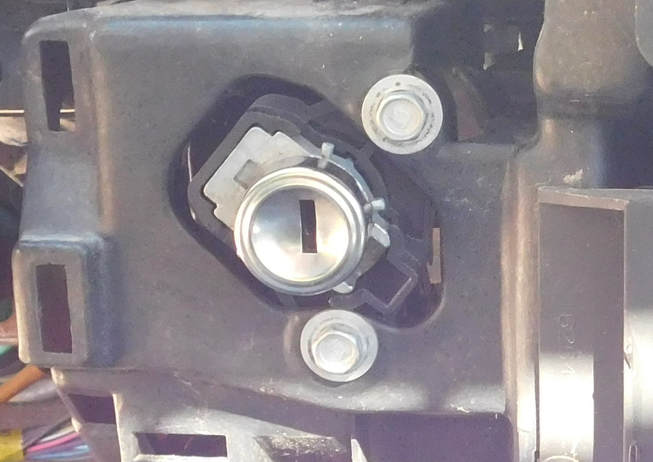
Step: 1 Remove the ignition switch bezel using a hook shaped pick or right angle screw driver. The plastic bezel just clips in to the outside of the lock cylinder. Be sure to pull a little bit going back and forth on opposing sides. With age the plastic could be brittle.
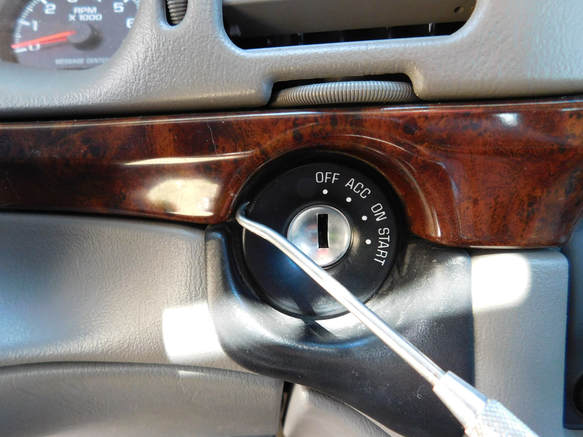
First remove the trim bezel from the ignition switch
Step 2: Remove both the driver and passenger side fuse panel covers, There are bolts hiding behind each one that will be remove in the next steps. The fuse panel doors are held in by clips shown, pry gently with your fingers from the top and bottom.
Remove fuse panel doors, both sides
Step 3: Remove this panel by pushing on these tabs indicated by the vertical arrows. As you pull down also pull out to pull the plastic mount off the stud indicated by the horizontal arrow. You may need to pull the carpet back just a little bit.
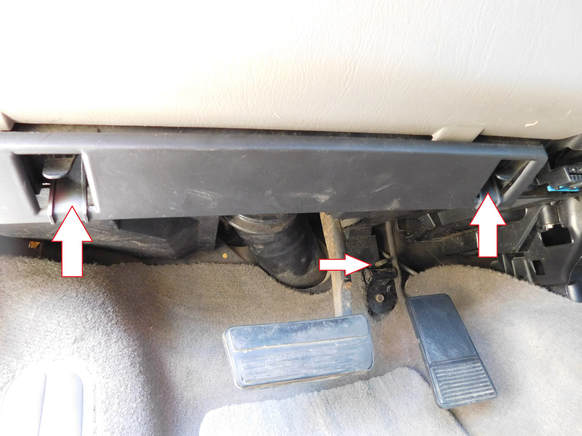
Remove by pulling these tabs
Step 4: Remove the courtesy light by twisting the socket 1/4 turn counter clockwise. This will release it from the panel. Set panel aside.

Remove foot well light
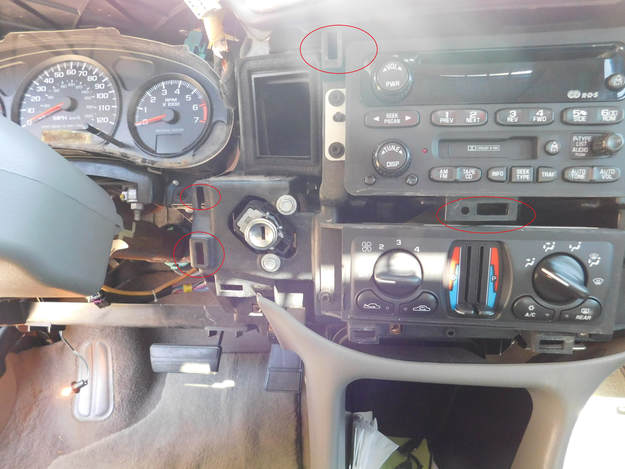
Step 5: Remove the panel screws circled in red.
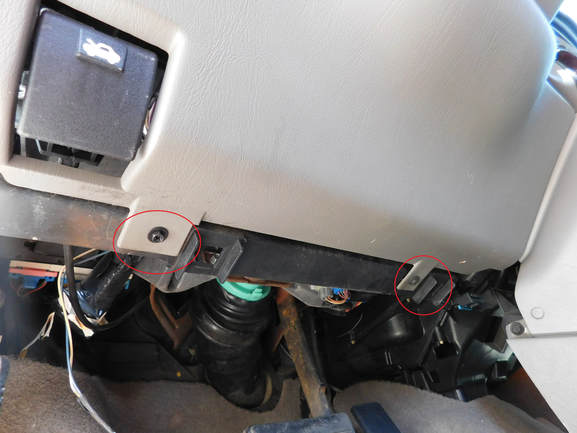
Remove the panel screws circled in red
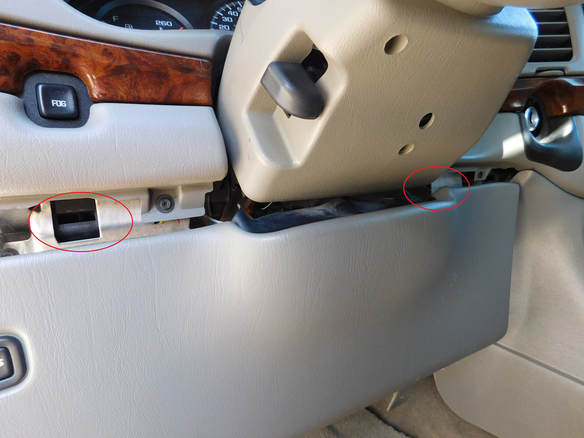
Step 6: Remove panel by pulling out the two tabs indicated here.
Step 7: Remove the electrical connector from the trunk switch. Lightly pry the retaining tab up and pull the connector out.

Step 8: Remove all the panel screws holding on the main fascia. Remember their is a screw on the passenger side as well behind the fuse door removed earlier.
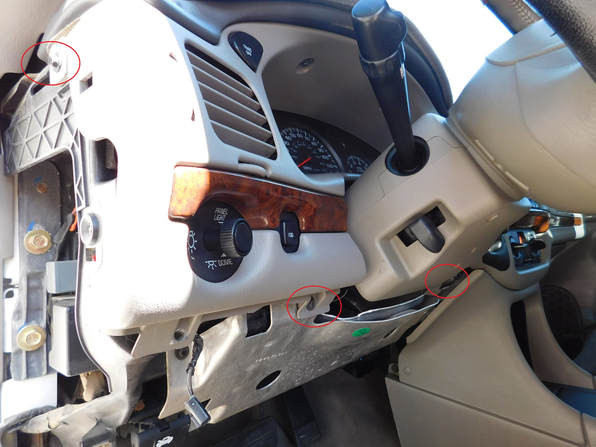
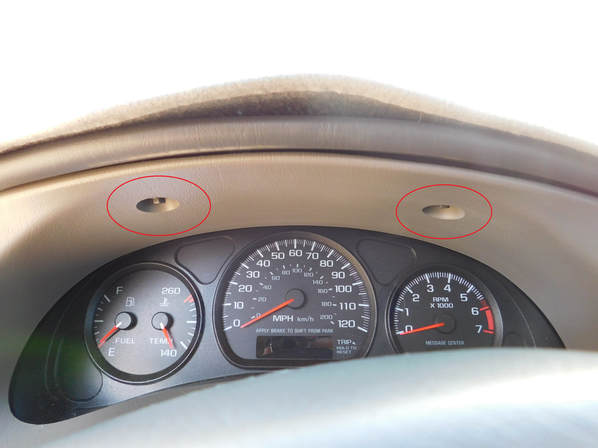
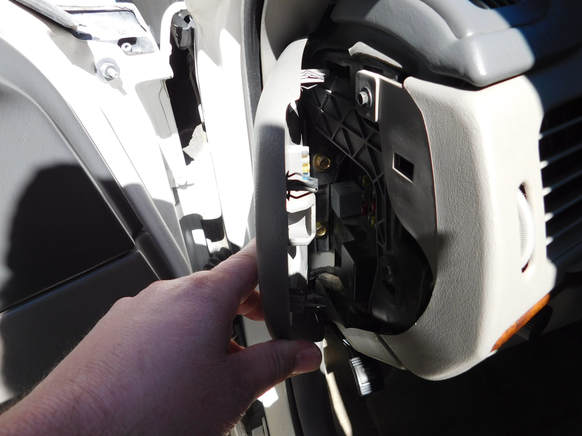
Step 9: Pull dash fascia outwards. The dash is now just held by several clips. Pull gently and they should release. Pull the dash out working back and forth across the dash to prevent excessive bending. Tilting the wheel all the way down will help get the gauge pod bezel around the column itself.
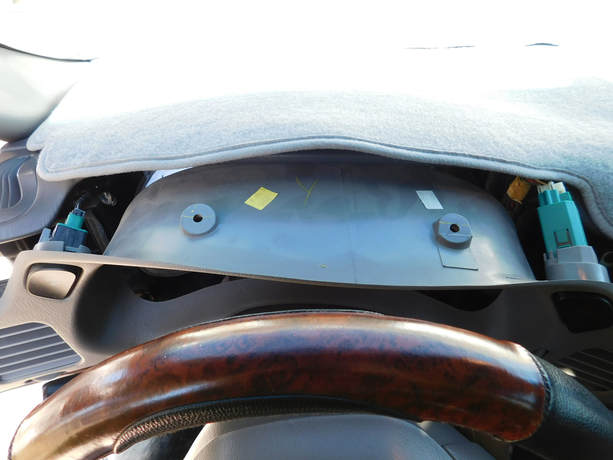
These next set of pictures show all the locations of the clip retainers.


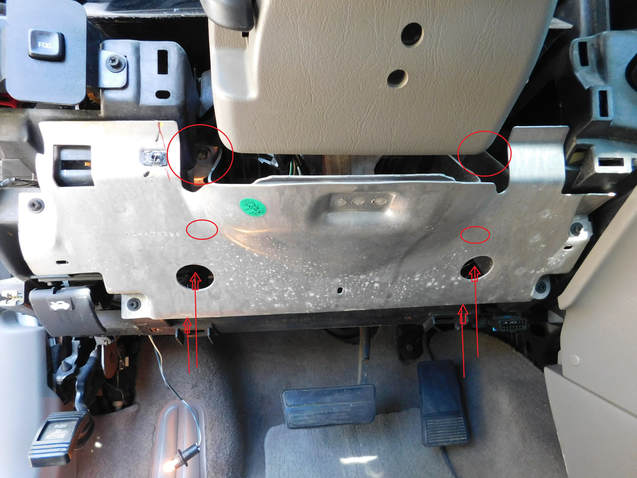
Step 10: Remove this metal plate. There are 4 (7mm) black panel screws and 4 (10mm) bolts that are slightly hidden that hold this part on.
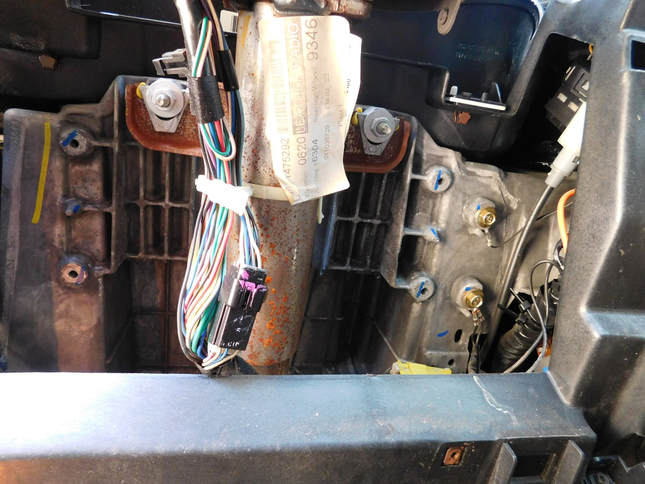
Step 11: Now your finally ready to remove the two bolts that hold the switch in.
Now carefully push the switch in and around the plastic that the switch mounts to. Watch the video for how to remove the lock cylinder and the connectors.
Re-install the reverse of how you took this apart!.
Resetting the Pass Lock system procedure:
1. Insert ignition key and turn to the “ON” position. Do not attempt to start the engine. Leave the key in the “ON” position for approximately 11 minutes. The security light will be steady on or flashing for the 11-minute period. Do not proceed to Step 2 until the security light turns off or stops flashing. 2. Turn the ignition switch to the “OFF” position for 30 seconds. 3. Turn the ignition switch to the “ON” position as in Step 1 for 11 minutes. 4. Turn the ignition switch to the “OFF” position for 30 seconds. 5. Turn the ignition switch to the “ON” position as in Step 1 for 11 minutes for a third time. 6. Turn the ignition switch to the “OFF” position for 30 seconds for a third time. 7. Turn the ignition switch to the “ON” position for 30 seconds. 8. Turn the ignition switch to the “OFF” position. 9. Attempt to start the engine. If the engine starts and runs, the relearn is complete.
Affiliate Link
Comments
|
 AuthorJon "the junk man" helping to promote responsible riding and recreation whether it be at the track or at the trail. Your source for motorcycle how to videos and much more! 
Archives
February 2023
 |

 RSS Feed