
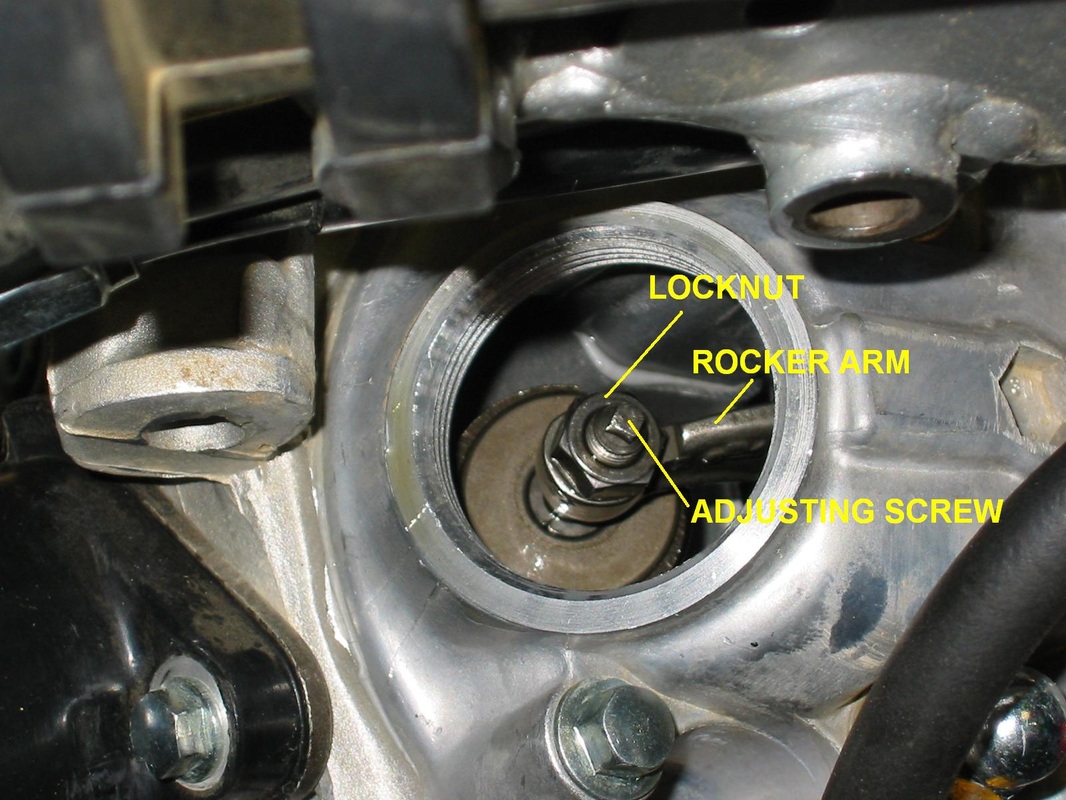
 Basic layout of a typical valve adjuster Basic layout of a typical valve adjuster If your motorcycle makes a “tick-tick-tick” noise from the top of the engine, chances are that the intake and/or exhaust valves are out of adjustment. Here’s how to perform an motorcycle valve inspection. I did this job on a spare horizontal CRR/XR50 (pit bike) clone engine however the same principles apply to most other four-stroke-powered motorcycles with set screw and locking nut adjusters. Shim over/under bucket type adjustments are measured the same way but the procedure for determining the correct thickness of shims is a whole other process not covered here.
Gain access to the top of the engine as necessary. You might need to remove the fuel tank and or other bodywork. Then you’re almost ready to remove the valve cover, but first clear away any dirt and debris with compressed air or a small brush. Removing the valve cover without first cleaning the area will leave the engine’s top end vulnerable to dirt you might accidentally knock into the engine, and that could cause damage to internal components. Remove the spark plug and then remove the valve cover(s). Inspect the valve cover seals/gaskets for damage and replace them if necessary upon reassembly. Now you need to set the engine at top dead center (TDC) on the compression stroke so that you can get an accurate measurement of the valve clearances. For most engines you will have to remove the timing plug on the side engine’s crankcase. While looking through the timing hole, use a wrench or socket to slowly turn the flywheel. Turn over the engine until the line on the flywheel aligns with the the marker — usually an arrow or dot — on the engine case. (Make sure you don’t mistake the engine timing marks as the TDC indicators.) Now the engine is ready for the valve clearance check. Check the clearance of all valves with a feeler gauge. If the gauge won’t slide between the valve stem tips and the adjusting screws, rotate the engine one turn to put it on the compression stroke. There should be a slight drag against the feeler gauge as you slide it between the valve stem tips and adjuster screws. If the valves are outside of the motorcycle manufacturer’s specification, adjust them as necessary. For this engine, I just had to loosen the valve stem lock nut, slide the appropriate feeler gauge in place and adjust it with a wrench until it was in spec. Hold the adjuster with a tappet adjuster tool (available from Motion Pro) and re-tighten the jam nut. Re-check the clearance before moving on to adjust the next valve. Re-install the valve covers, check and set the spark plug gap and then install it in the engine.
Comments
|
 AuthorJon "the junk man" helping to promote responsible riding and recreation whether it be at the track or at the trail. Your source for motorcycle how to videos and much more! 
Archives
February 2023
 |

 RSS Feed