|
If you have read about the GM Ignition switch recall 14350. Then you know that it does nothing with replacing the switch itself. In this post I will walk you through the steps needed to access and replace the faulty ignition switch that commonly wears out due to age and use.
The worn out switch can cause a few problems, most notably a no start or intermittent start condition. The intermittent start condition is when sometimes it takes a few turns of the key for the switch to make good enough contact to then activate the starter. The no start condition usually is a result of the worn contacts in the switch causing an interruption of the communication between the BCM (body control module) and the PCM (power-train control module). This communication check is part of the Pass Lock system that controls the Anit-Theft system in which it disables the fuel pump relay and the starter relay to prevent theft. However sometimes a faulty ignition switch can cause a false positive for the Pass Lock anti theft system. For a details on how to reset the Pass Lock see the end of this post. However if you came here to replace your ignition switch on your GM vehicle, watch the video below as well as the pictures on how to remove the dash components to access the switch mechanism. This ignition switch replacement applies to the following vehicles as they use the same switch part number. CHEVROLETIMPALA 2000-2005 CHEVROLETMALIBU 1997-2001 CHEVROLETMONTE CARLO 2000-2005 OLDSMOBILEALERO 1999-2001 OLDSMOBILECUTLASS 1997-1999 OLDSMOBILEINTRIGUE 1998-2002 PONTIACGRAND AM 1999-2001
Affiliate Link that supports the site
 Affiliate link that supports the site Affiliate link that supports the site
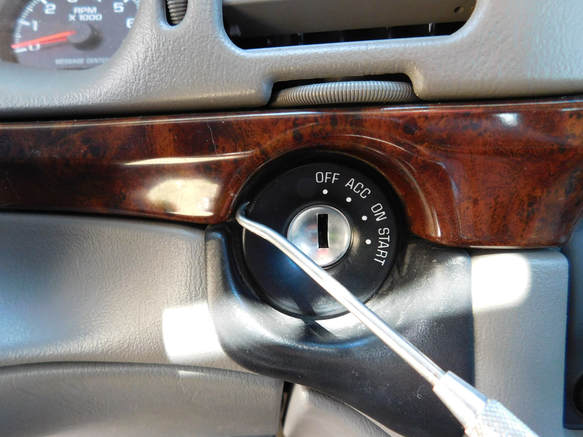
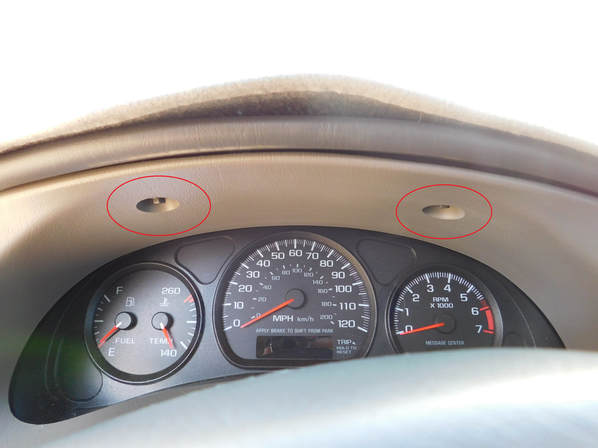
Step: 1 Remove the ignition switch bezel using a hook shaped pick or right angle screw driver. The plastic bezel just clips in to the outside of the lock cylinder. Be sure to pull a little bit going back and forth on opposing sides. With age the plastic could be brittle.
Step 2: Remove both the driver and passenger side fuse panel covers, There are bolts hiding behind each one that will be remove in the next steps. The fuse panel doors are held in by clips shown, pry gently with your fingers from the top and bottom.
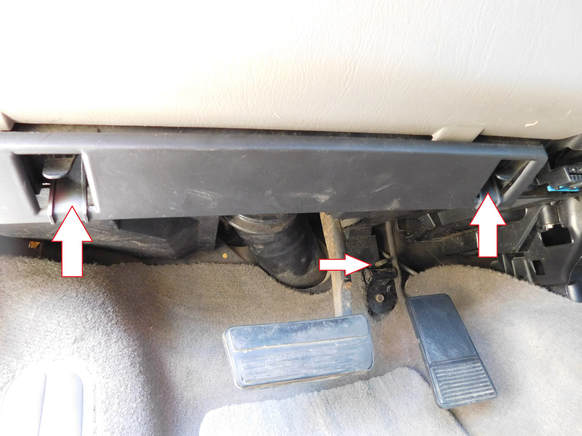
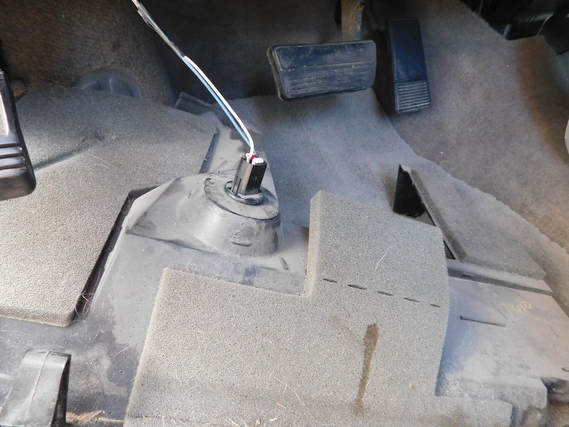
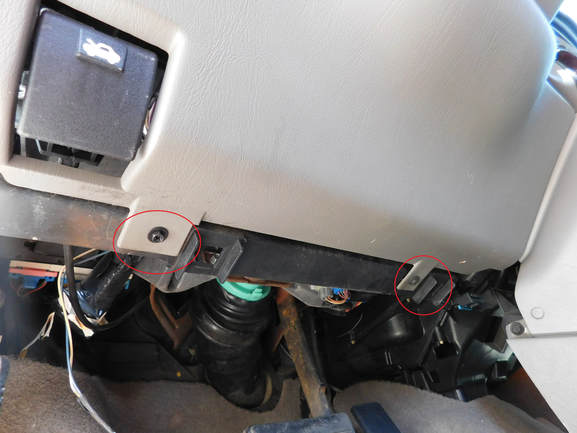
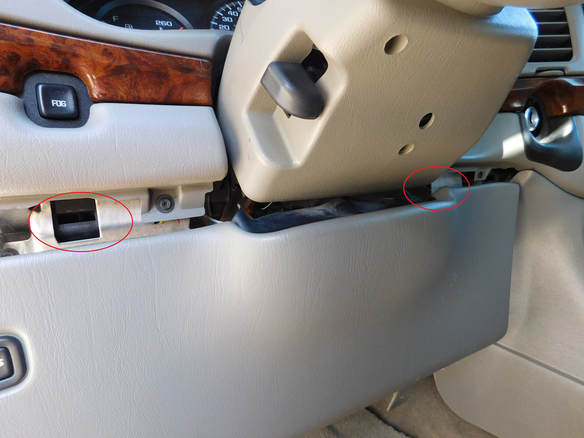
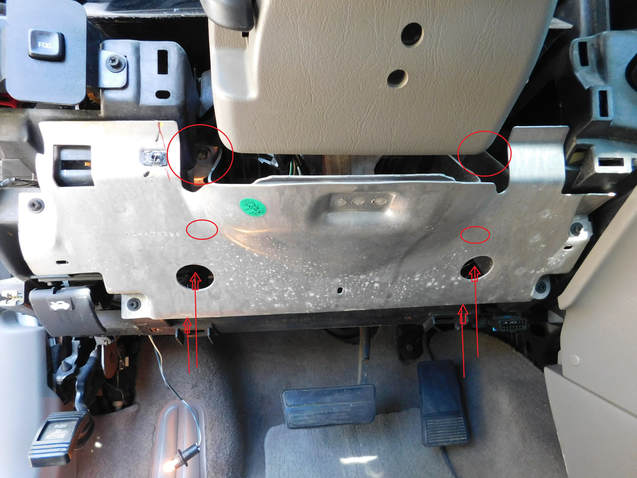
Step 3: Remove this panel by pushing on these tabs indicated by the vertical arrows. As you pull down also pull out to pull the plastic mount off the stud indicated by the horizontal arrow. You may need to pull the carpet back just a little bit.
Step 4: Remove the courtesy light by twisting the socket 1/4 turn counter clockwise. This will release it from the panel. Set panel aside.
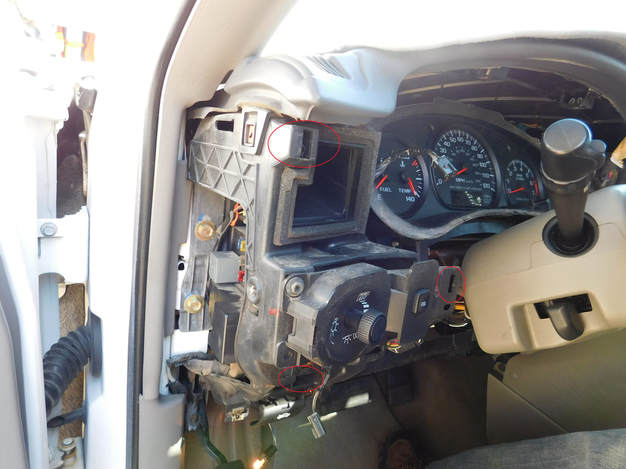
Step 5: Remove the panel screws circled in red.
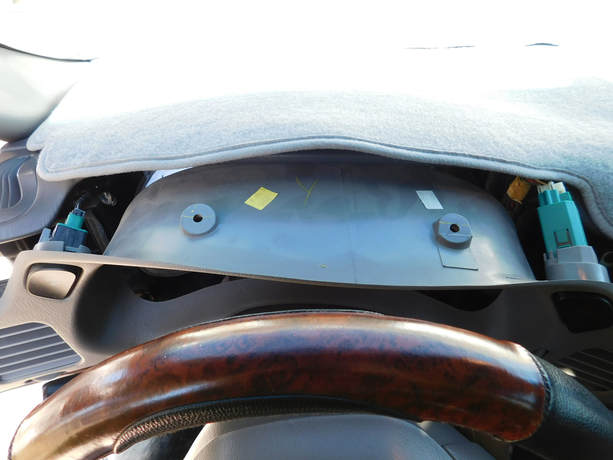
Step 6: Remove panel by pulling out the two tabs indicated here.
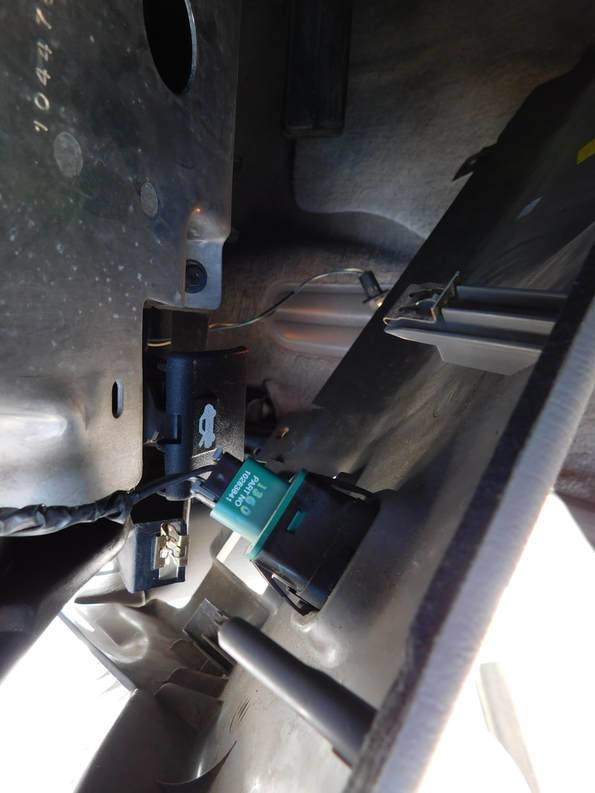
Step 7: Remove the electrical connector from the trunk switch. Lightly pry the retaining tab up and pull the connector out.
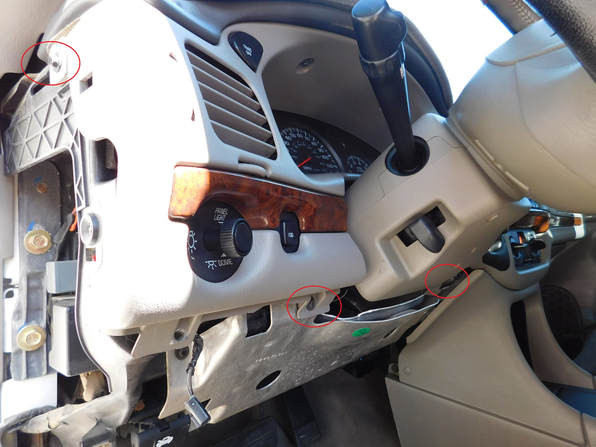
Step 8: Remove all the panel screws holding on the main fascia. Remember their is a screw on the passenger side as well behind the fuse door removed earlier.
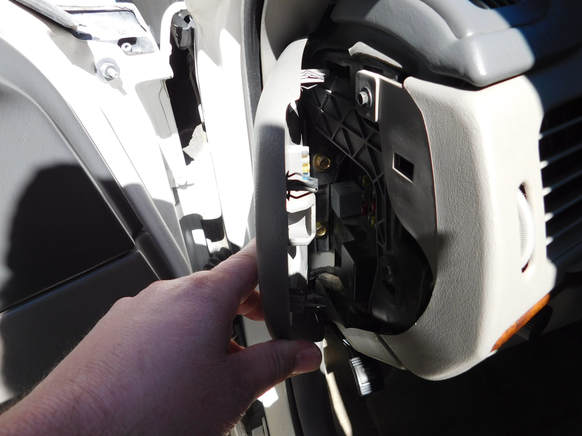
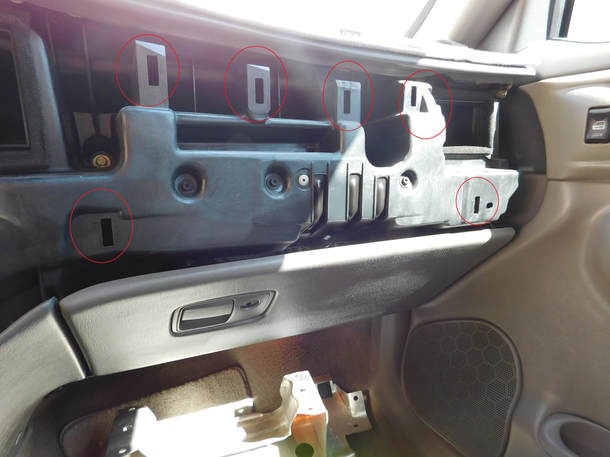
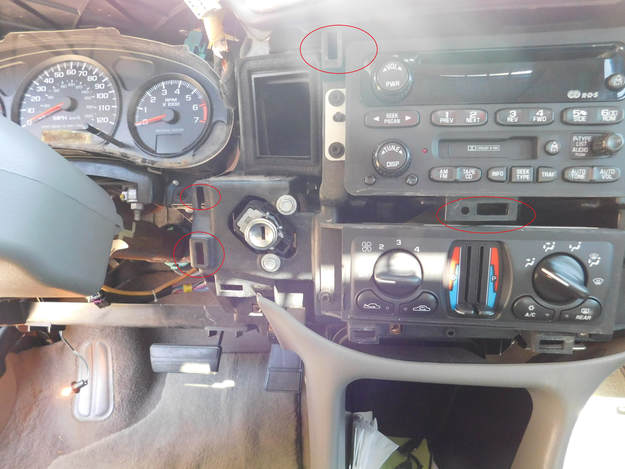
Step 9: Pull dash fascia outwards. The dash is now just held by several clips. Pull gently and they should release. Pull the dash out working back and forth across the dash to prevent excessive bending. Tilting the wheel all the way down will help get the gauge pod bezel around the column itself.
These next set of pictures show all the locations of the clip retainers.
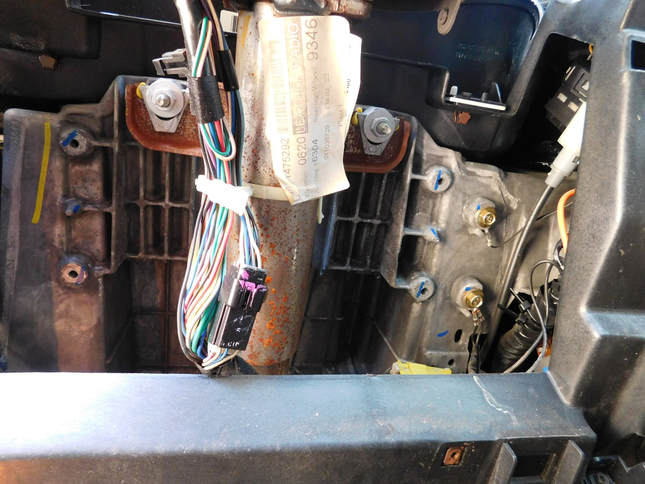
Step 10: Remove this metal plate. There are 4 (7mm) black panel screws and 4 (10mm) bolts that are slightly hidden that hold this part on.
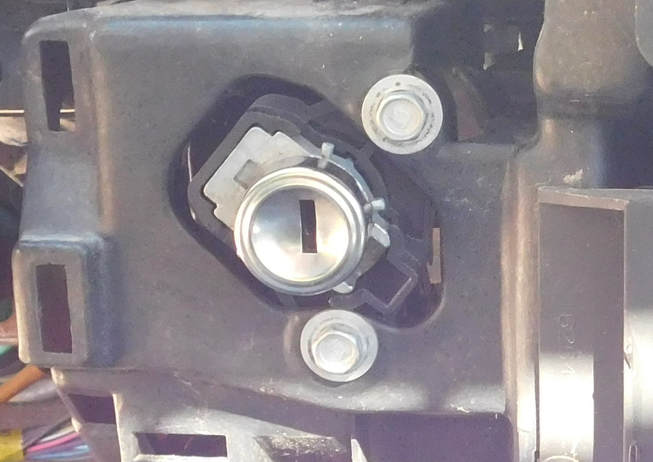
Step 11: Now your finally ready to remove the two bolts that hold the switch in.
Now carefully push the switch in and around the plastic that the switch mounts to. Watch the video for how to remove the lock cylinder and the connectors.
Re-install the reverse of how you took this apart!.
Resetting the Pass Lock system procedure:
1. Insert ignition key and turn to the “ON” position. Do not attempt to start the engine. Leave the key in the “ON” position for approximately 11 minutes. The security light will be steady on or flashing for the 11-minute period. Do not proceed to Step 2 until the security light turns off or stops flashing. 2. Turn the ignition switch to the “OFF” position for 30 seconds. 3. Turn the ignition switch to the “ON” position as in Step 1 for 11 minutes. 4. Turn the ignition switch to the “OFF” position for 30 seconds. 5. Turn the ignition switch to the “ON” position as in Step 1 for 11 minutes for a third time. 6. Turn the ignition switch to the “OFF” position for 30 seconds for a third time. 7. Turn the ignition switch to the “ON” position for 30 seconds. 8. Turn the ignition switch to the “OFF” position. 9. Attempt to start the engine. If the engine starts and runs, the relearn is complete.
Affiliate Link
Comments
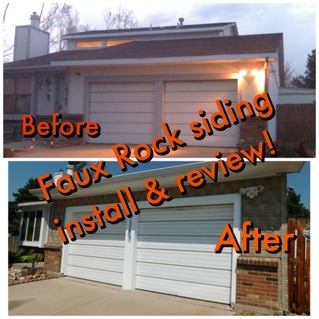
Quick, inexpensive and easy to install siding for instant curb appeal! This Faux rock PVC siding looks like real stacked stone rock!
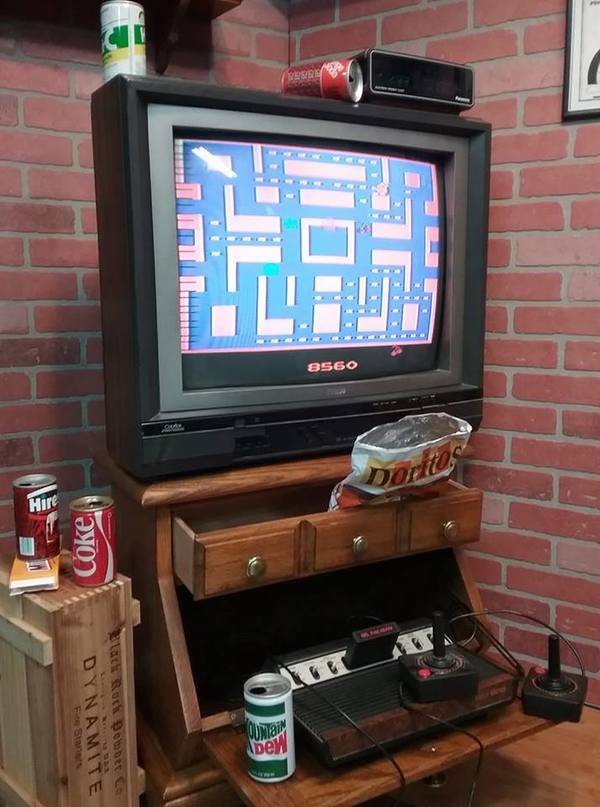
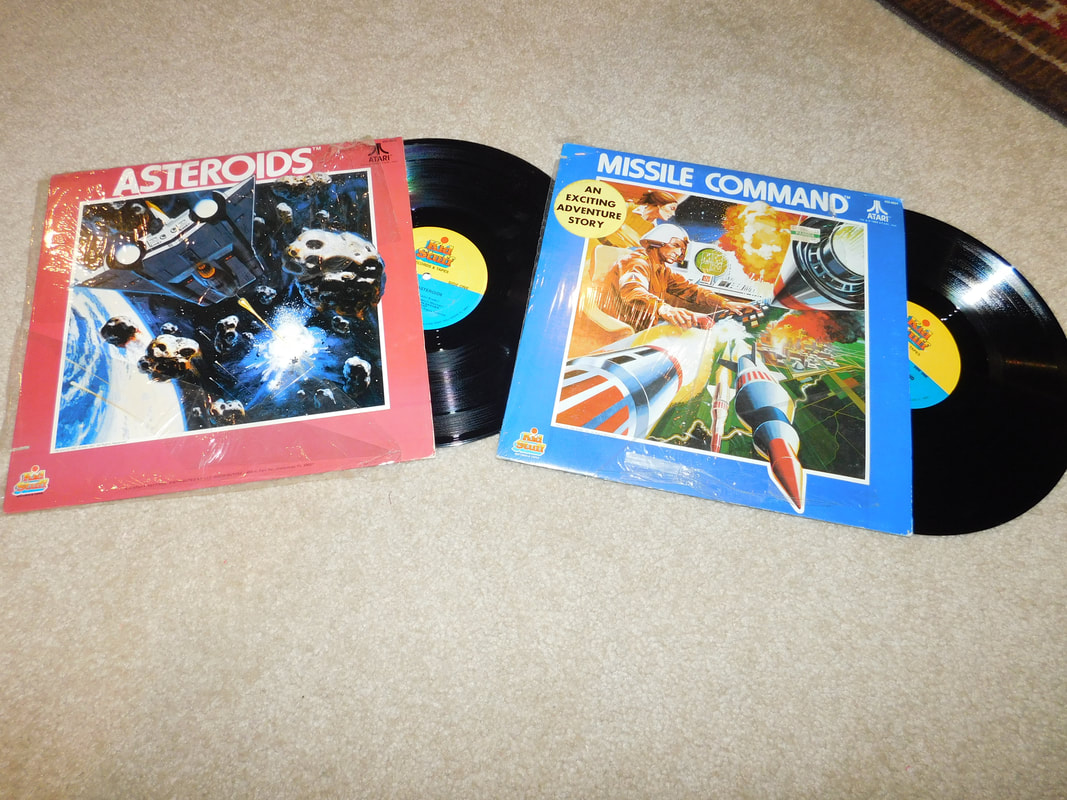
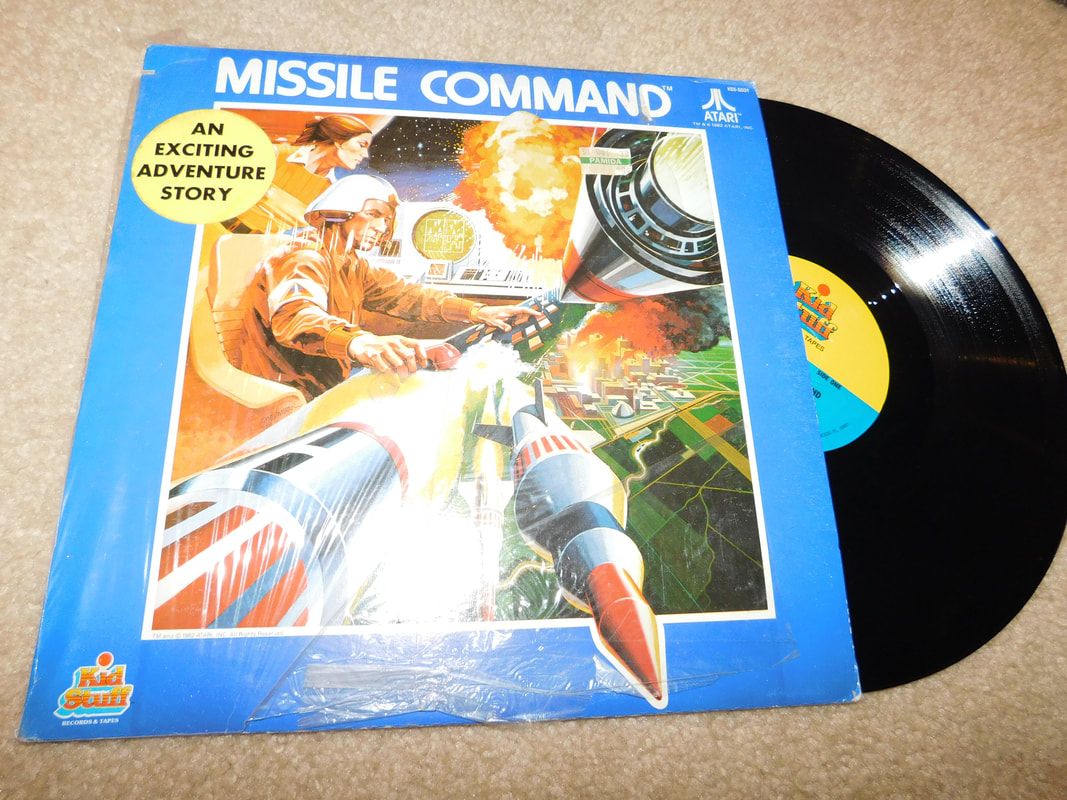
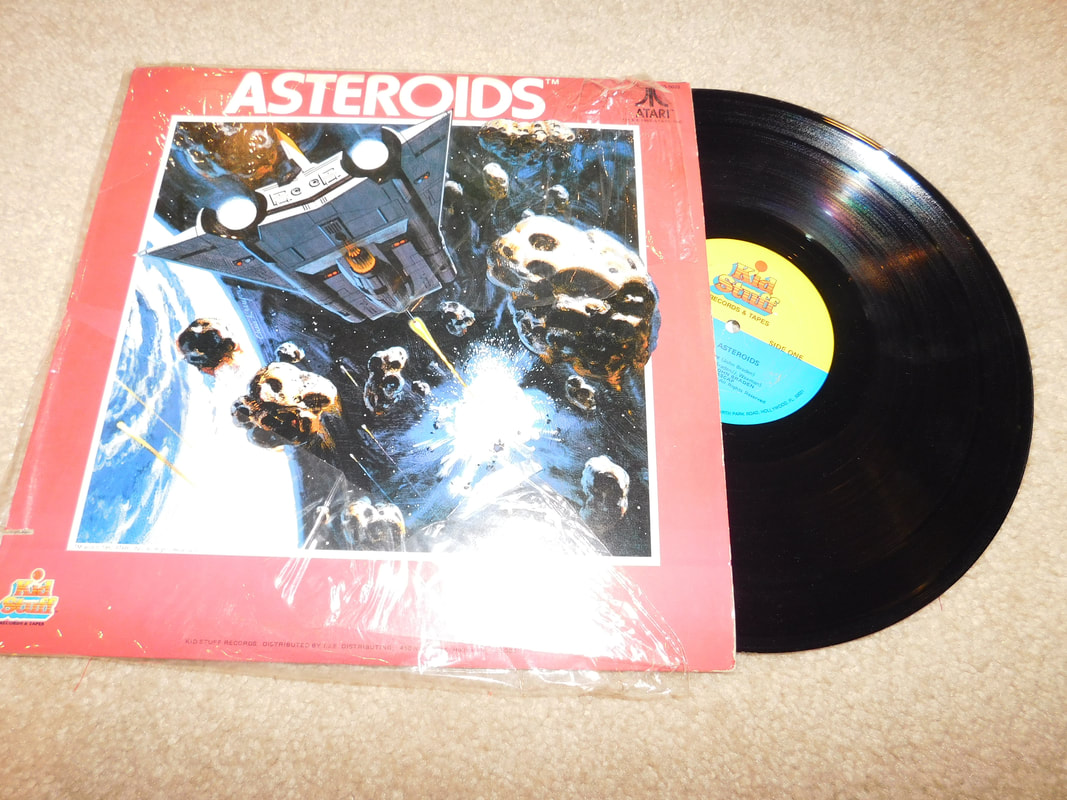
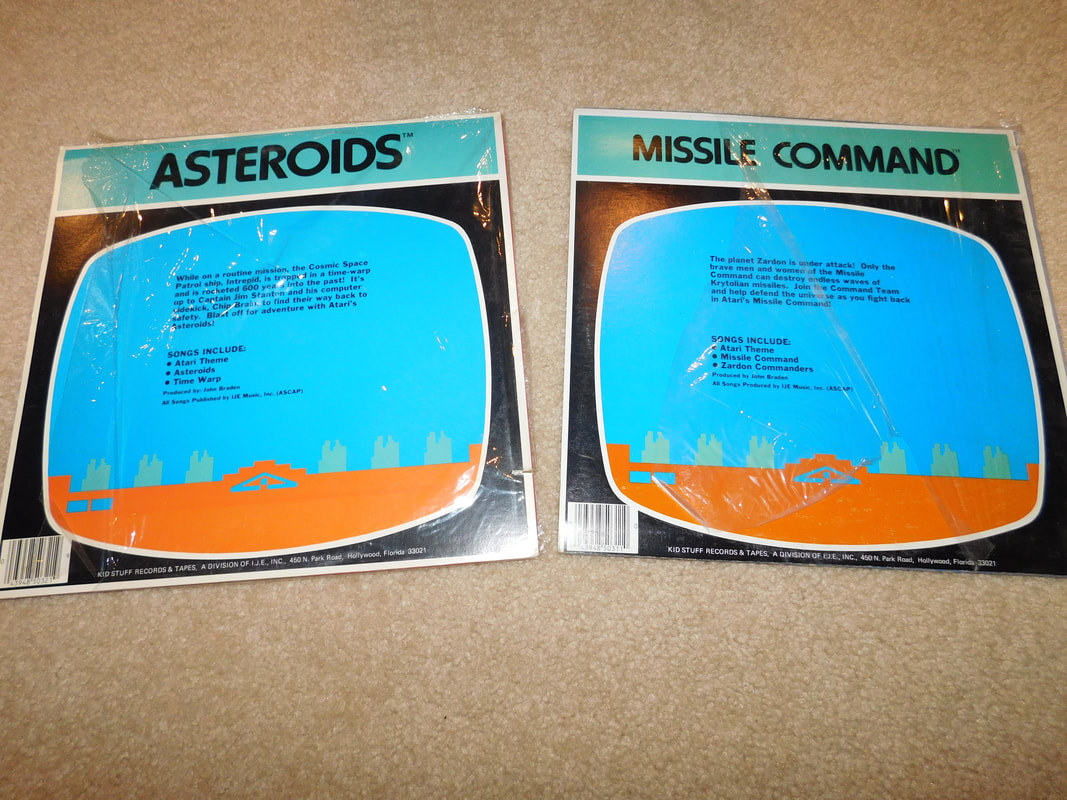
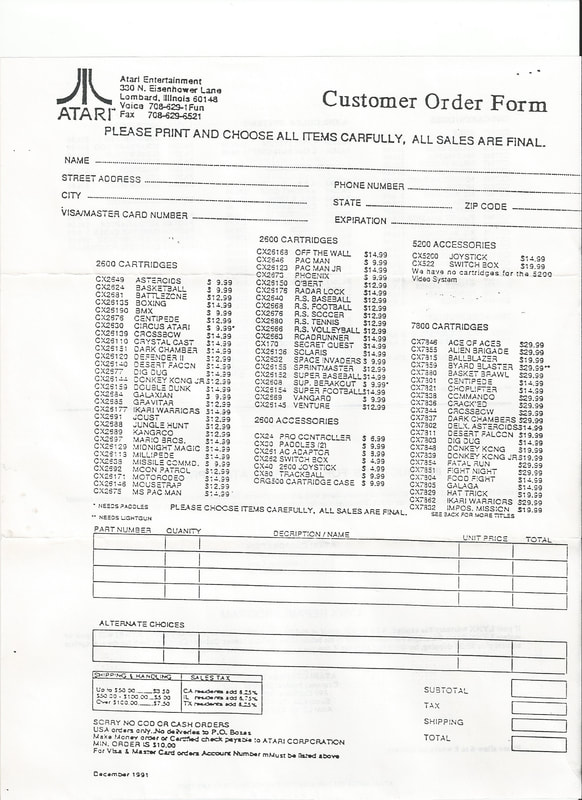
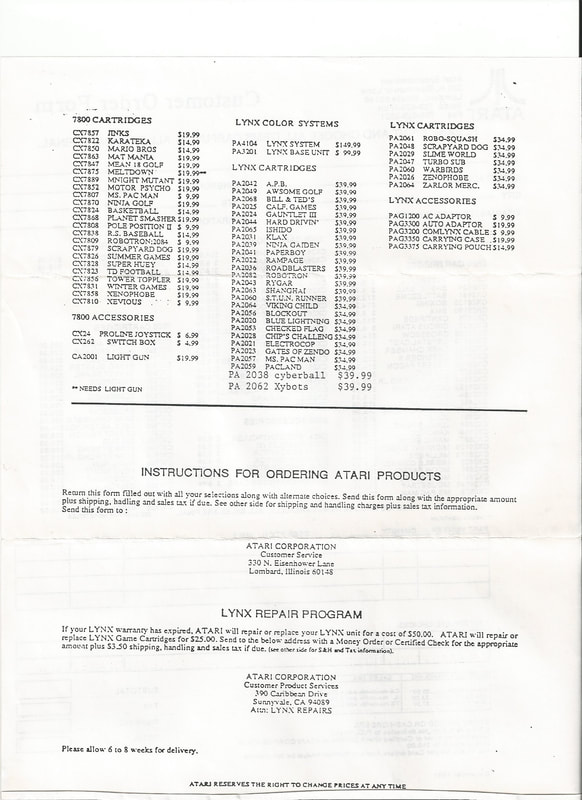
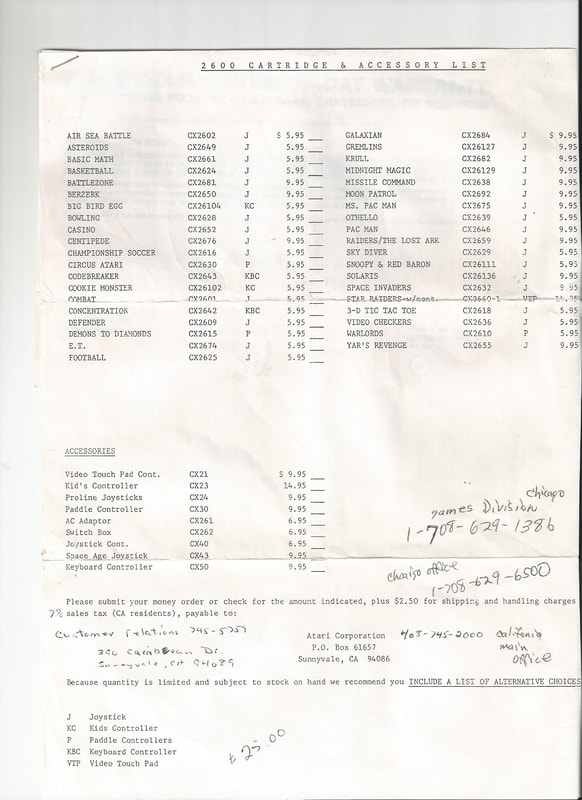
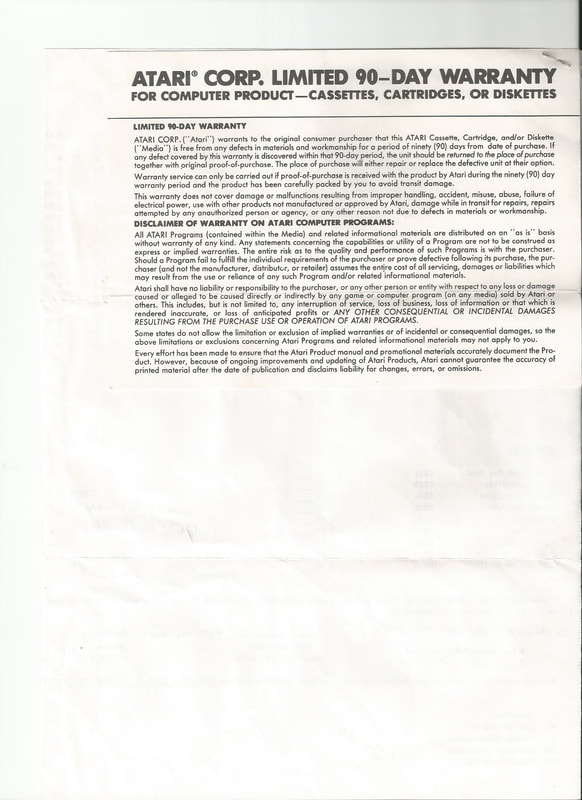
I got this vinyl siding from Faux Panels.com shipped to my door. I chose this particular line and style of siding mostly on price, the bonus is this is MADE IN U.S.A! This is not a sponsored post, I am just very happy with the product and the service all the way around. Side note: I had one box of "J" channel damaged in transit and the company promptly sent out replacements. I did provide pictures of the shipping damage. The exact product I used is Faux Panel's York PVC siding, in the Random Rock pattern, Mesa is the color. However there are several other styles and colors just in this particular line alone. The company has other, more expensive, product lines for various other looks and applications. This is just what I chose. Now to be honest up close and touching this will reveal it is a typical vinyl/pvc siding, also the "J" channel gives it away if you are one that looks for those details. That is not the point here though, I was in a situation where it was paint the house or side it with a low (no?) maintenance siding product to spruce up the looks of the house. Watch the video below for a complete installation of the siding. 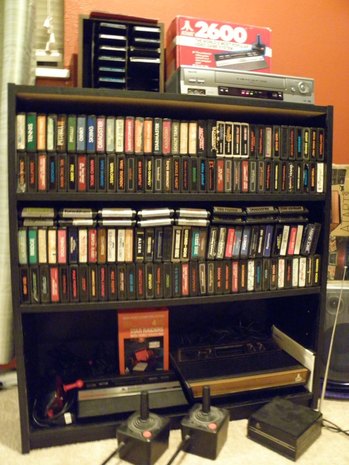 My Atari 2600 game collection display (needs work) My Atari 2600 game collection display (needs work) Most people know me and my site for vintage motorcycles, but I have another closet hobby, retro video games. Specifically the Atari 2600. My collection stemmed, like a lot of peoples collections, from things from my childhood. The one difference here is I was collecting for this particular system while they were still making some games for it. To give you a time frame, the Nintendo Entertainment System was out in full force, Atari (as people knew it) was spiraling down with failed system after failed system. I bought brand new games in the clearance bins for little more than a dollar. Then the Super Nintendo came out, and Atari 2600 games found their second life at garage sales and flea markets. I remember seeing boxes and boxes of Atari 2600 games littered across many flea market stands. I would comb for hours sometimes through hundreds of cartridges and accessories that I didn't have. The going rate for games in the early 90's... $0.25 to $1.00, yep. I would pass on a stand if they were selling them for over $2, they just weren't worth it. And this is well before even knowledgeable Atari 2600 players or the Atari Age website even started. I shudder to think the rare, or even prototype games I might have passed on because they were asking $3 or more for a game. Hell loose NES games were going for $10 and that system was still relevant at the time. I don't have too many boxes for the games as the games I bought new off the shelf, well at the time when the system was still relevant, why would you keep the boxes? It was the game and the manual that had any sort of value. Boxes just took up room. Hind sight is always 20/20. I doubt I saw a T-handle Air Raid cartridge in those years, but it could be possible that I passed it over thinking it was for another system, doh! Since the "internet age" began my collecting became more casual. I only buy or collect a game or peripheral that I really intend to play with. I never had the intention (even back then) to be a completionist or collect a "super rare" game just because it is "super rare". I also own a Panasonic 3DO, now there is a flop. More close ups from my Atari collection. Below are some "Kids Stuff" 33 1/3 rpm 12in vinyl records that have a story and some songs centered around the Atari games Asteroids and Missile Command, not pictured but there is also a Yar's Revenge record as well. I bought these on clearance in the late 80's brand new for $0.99 one still has the price tag on it. Below is some paper work I saved for a reason. Atari customer order forms, game lists, and contact numbers for parts and service. My have times changed. Check it out Nintendo of America, Coleco? Yes I called these numbers for either game help or ordering information.
What happens when you want to build something great, but you don't totally have a clear picture of what you want in your head? Well you jump in and start building and make it up as you go along.
Now read through and check out the pictures. Be sure to comment and tell me everything I did wrong ;)
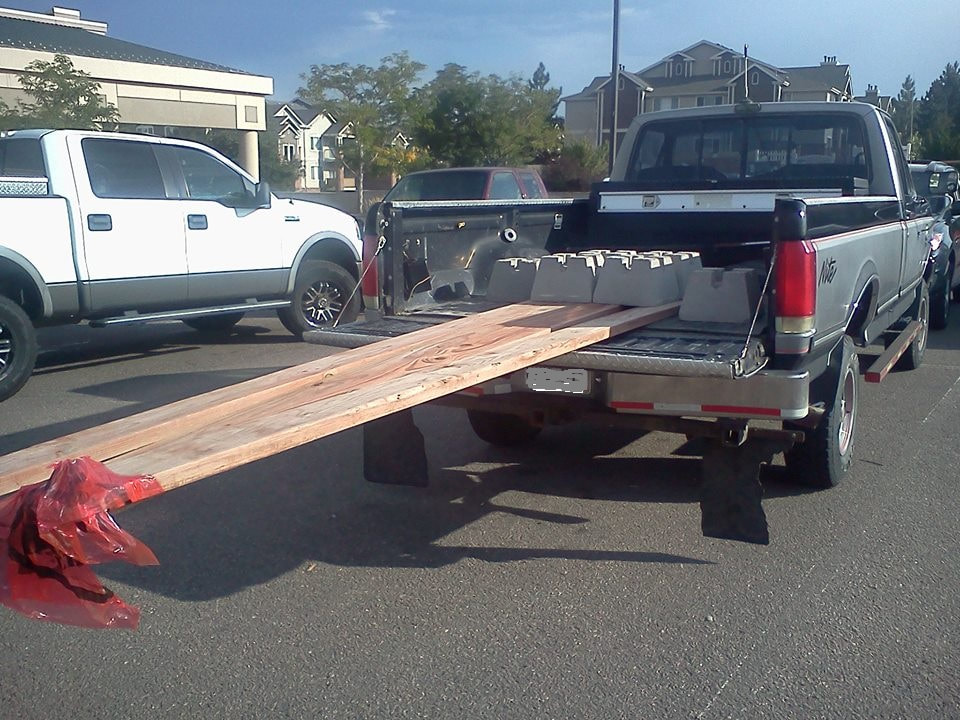
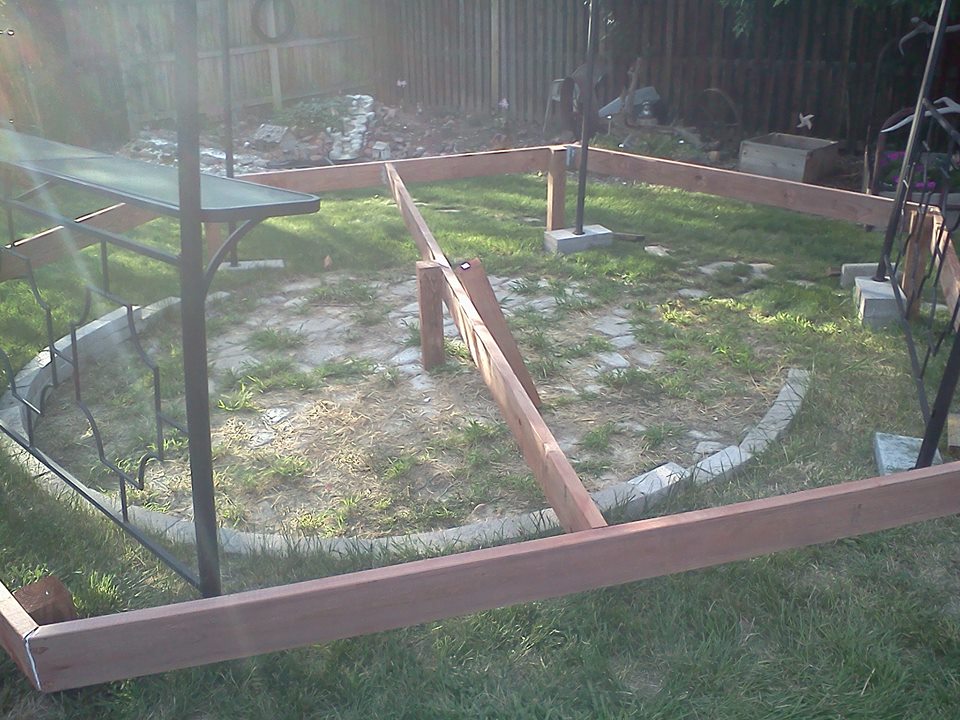
First I knew I was going to need some sort of base and structure for a hexagon shaped platform. I got some treated 2x12's and some concrete deck blocks as well as some 4x4 posts.
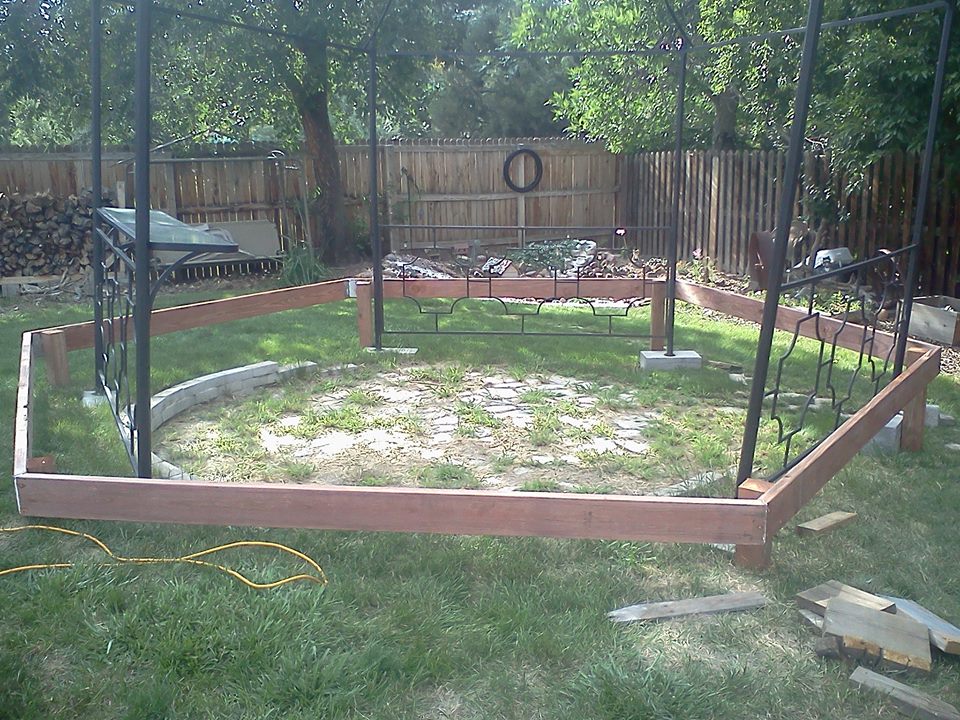
The basic perimeter and location in the yard. Basically to cover up this section that was laid in by the previous home owner. The steel frame pictured is a unit I bought on clearance for about $100. This is the basis for the size and structure of the Gazebo. As you notice I have a slope to the yard. I used blocks to find level for the perimeter and then cut the legs to length accounting for the height of the deck blocks.
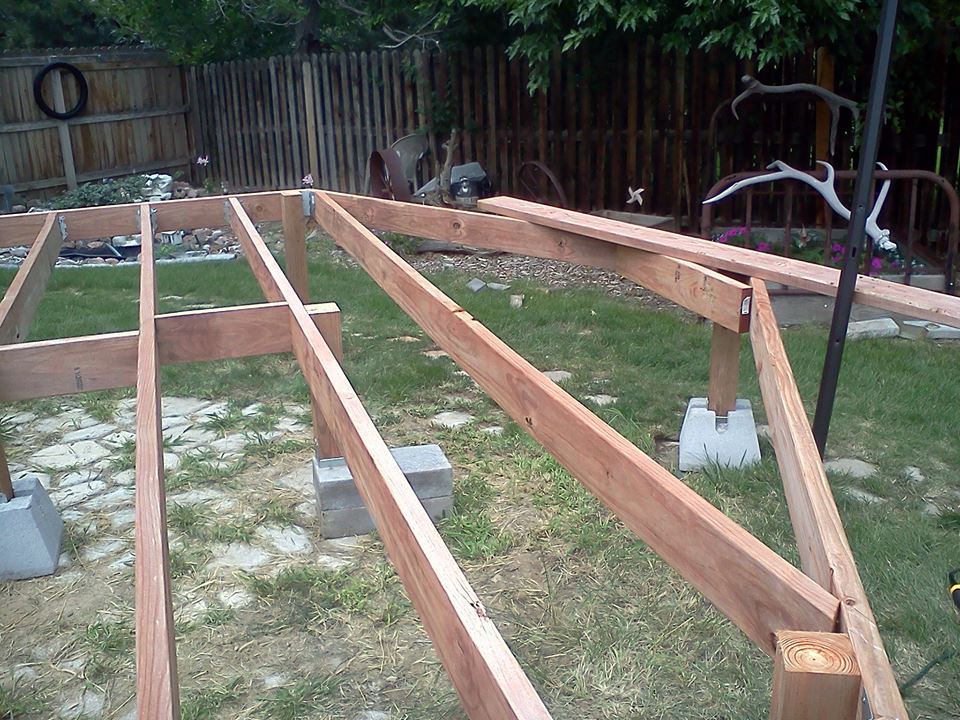
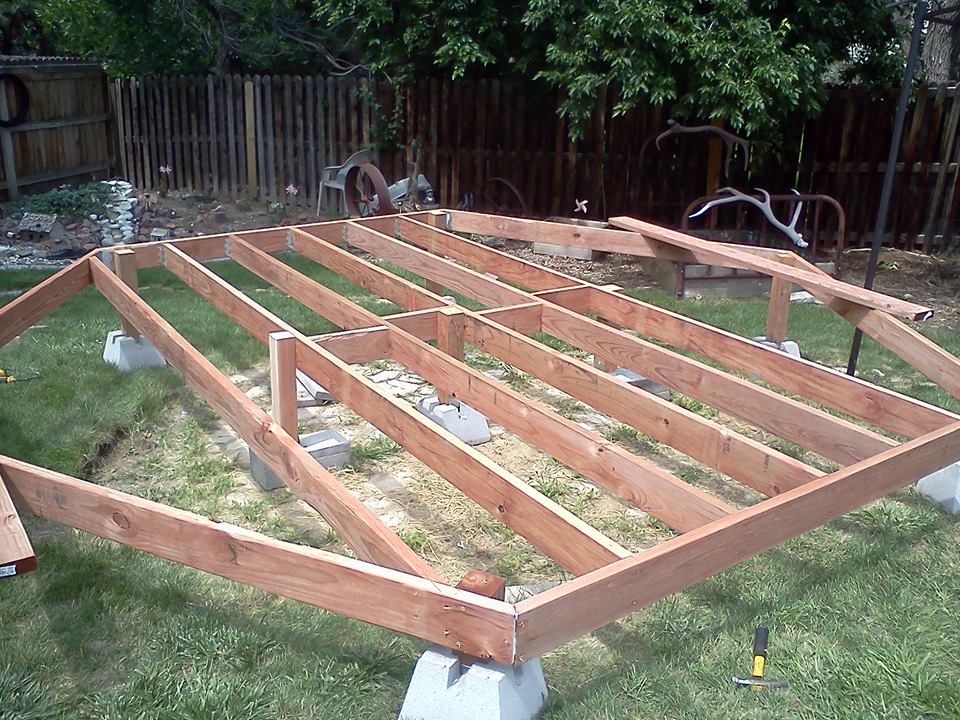
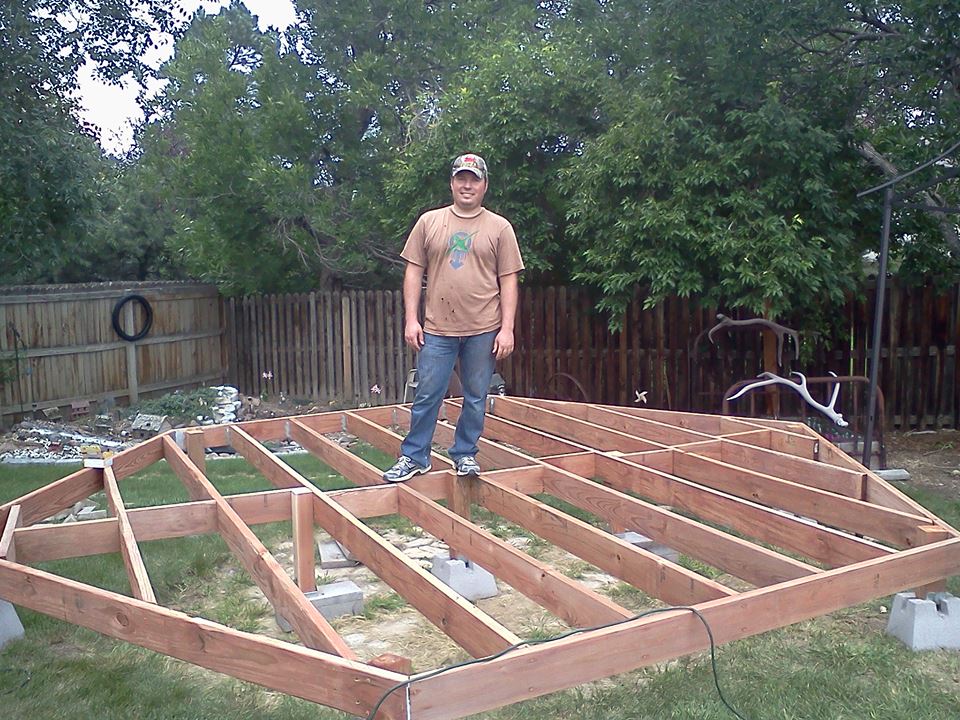
I found the center-line and measured for the cut of the first joist. Basically measure and cut for each successive joist. Attached using joist hangers. Carriage bolts for the 4x4 posts to support the center.
16 inch on center is what I used for the spacing of the joists.
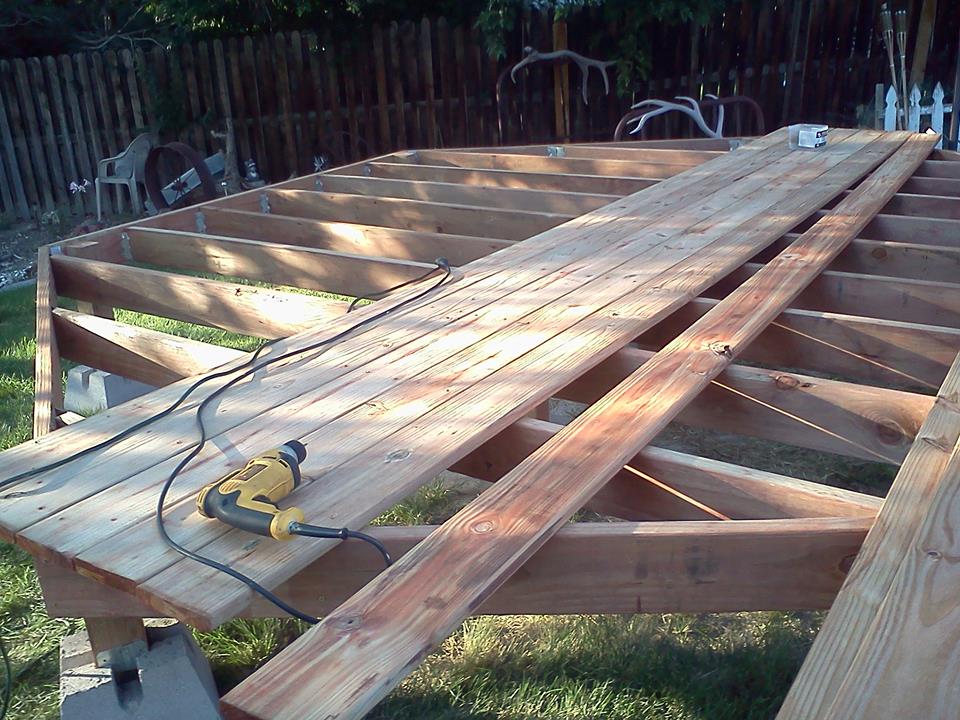
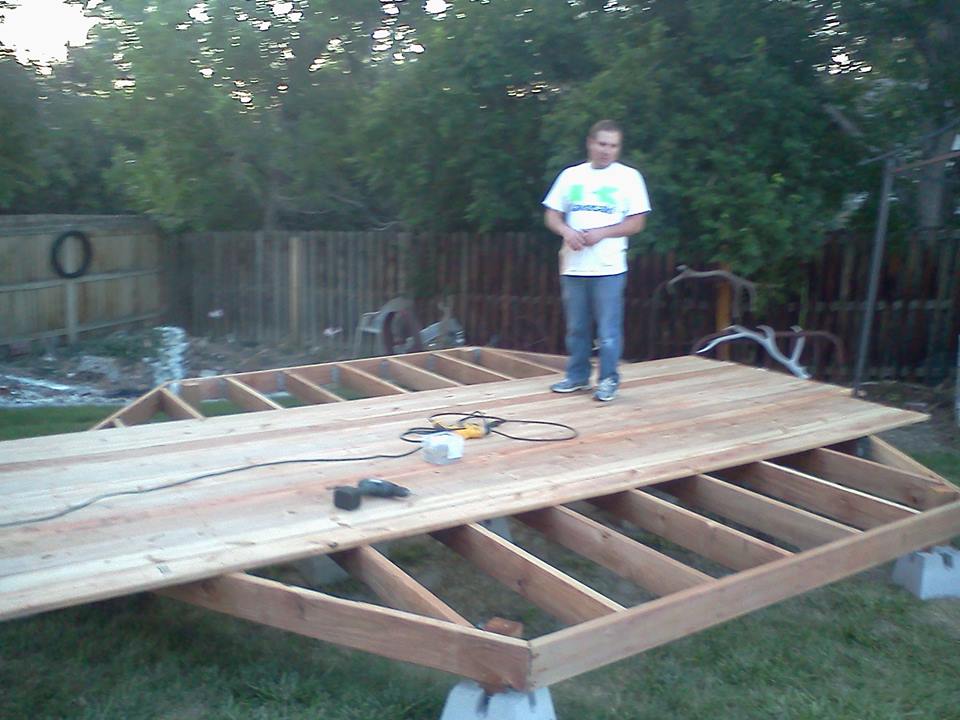
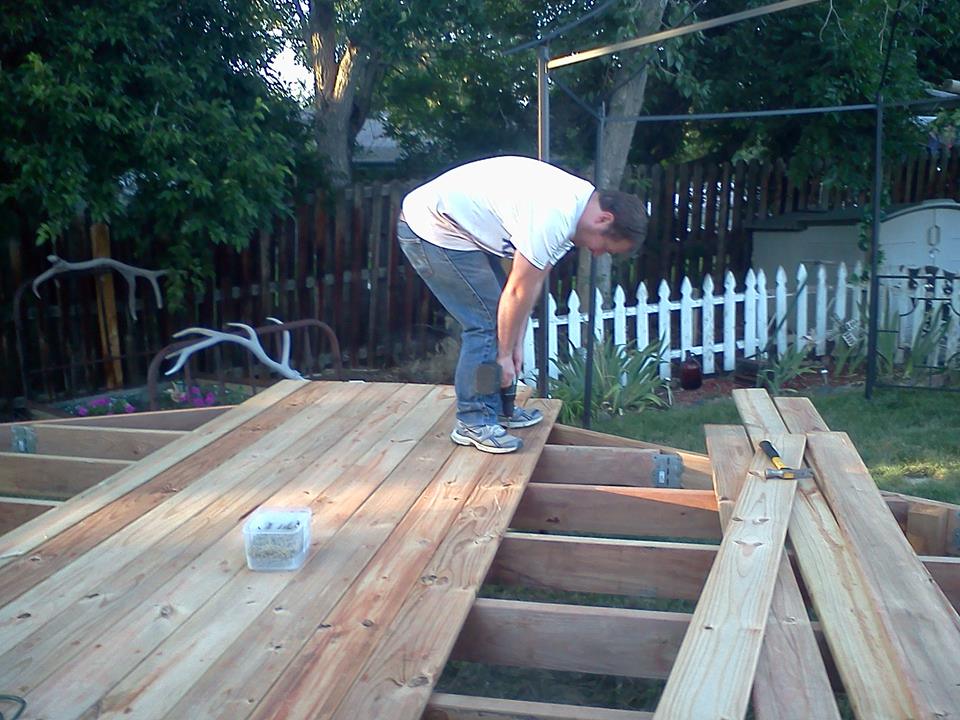
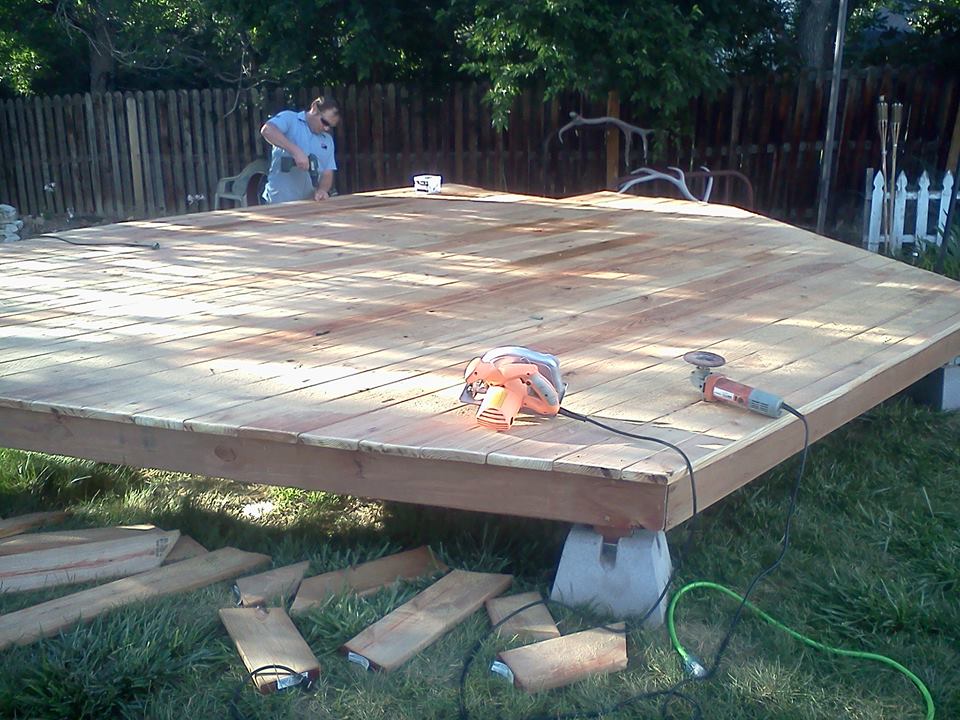
Laying the redwood deck boards. I am not skilled enough to do any fancy pattern so I choose a direction and laid them out leaving an appropriate space between for water/snow to flow through. I used deck screws to fasten them.
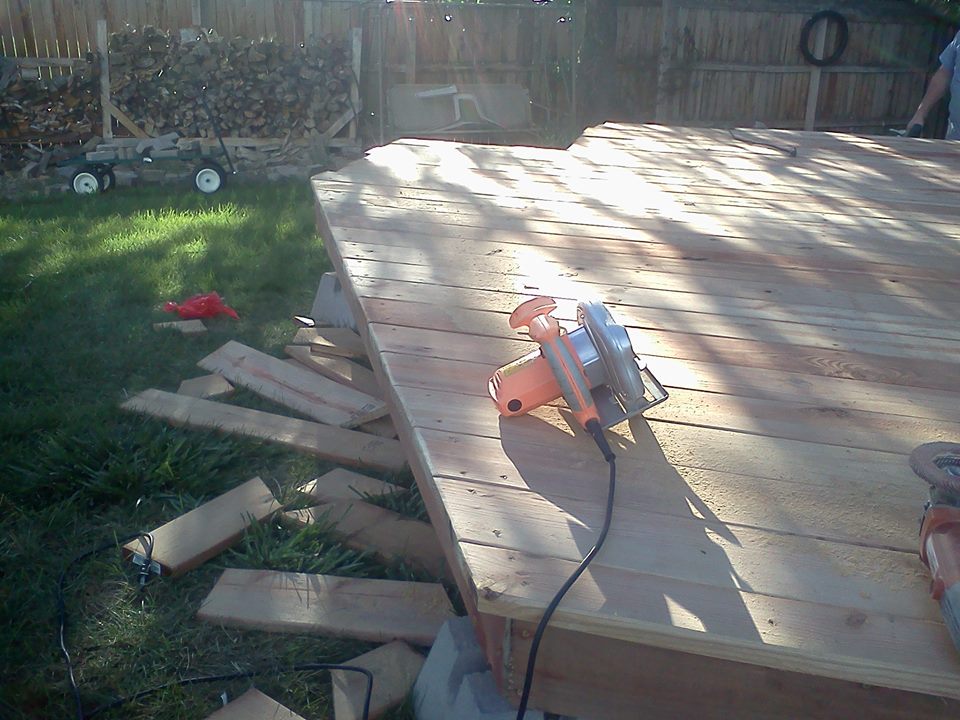
I snapped a chalk line and used my circular saw to cut off the excess.
I used a 40 grit flap disc to just hand bevel the ends after the cut just to take off the sharp edge. I suppose I could have used my router and put a specific round over profile, but this was quick.
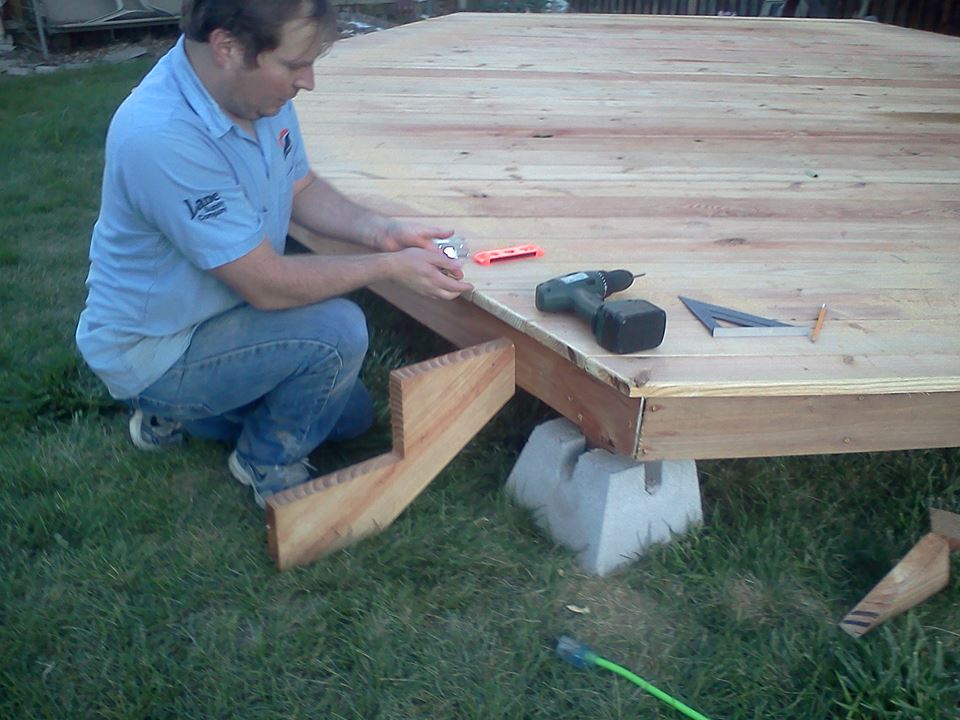
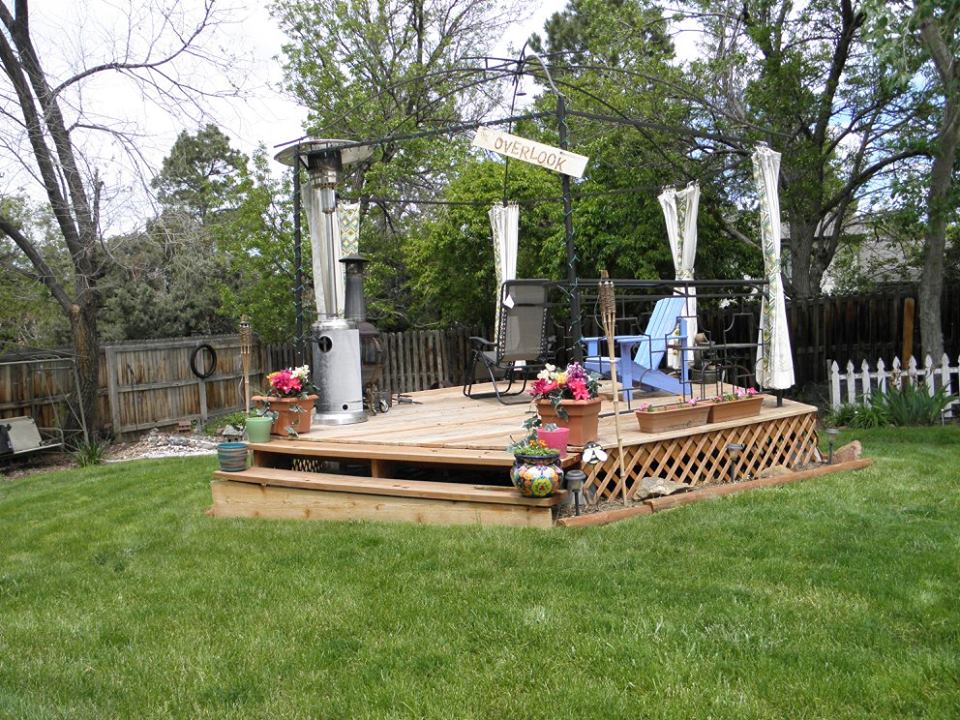
Installing the stairs. I just bought pre-cut stair stringers and used joist hangers (not shown) to attache them.
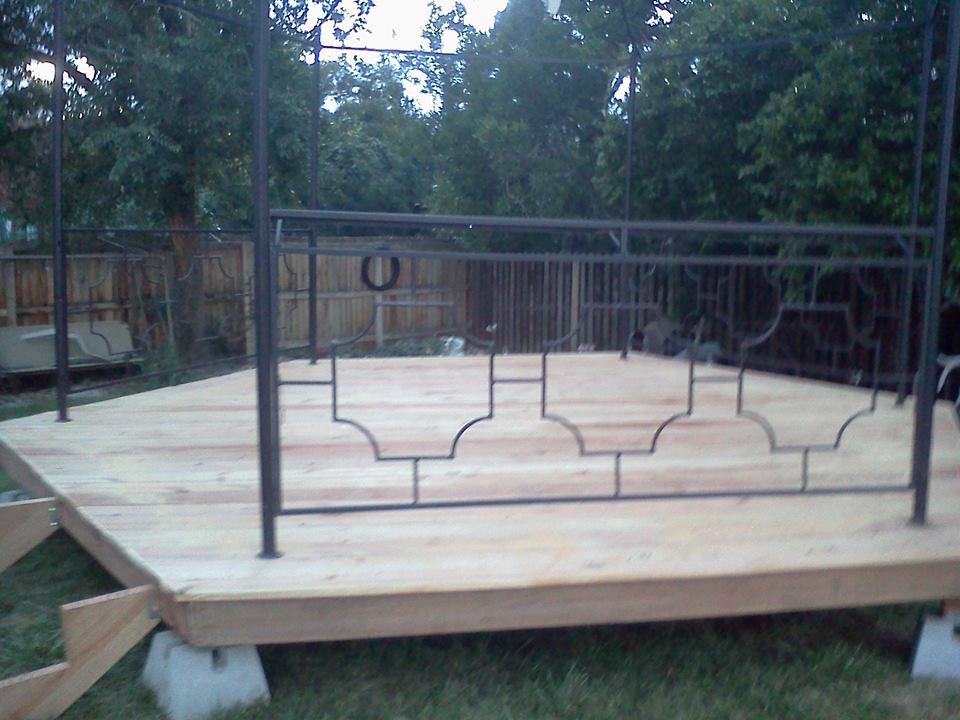
Gazebo frame positioned on the deck.
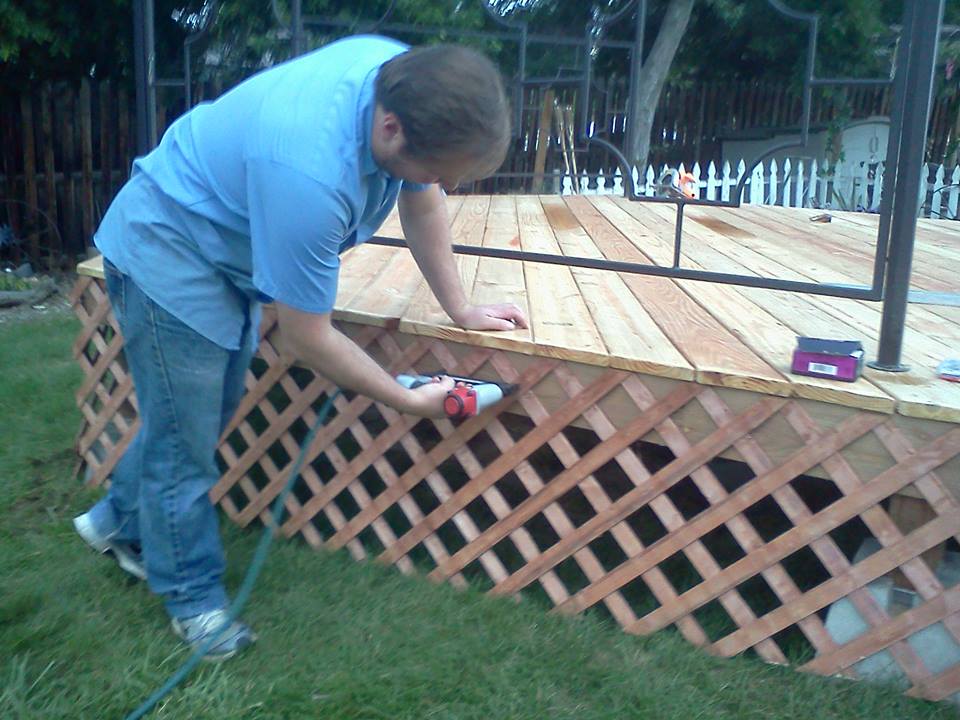
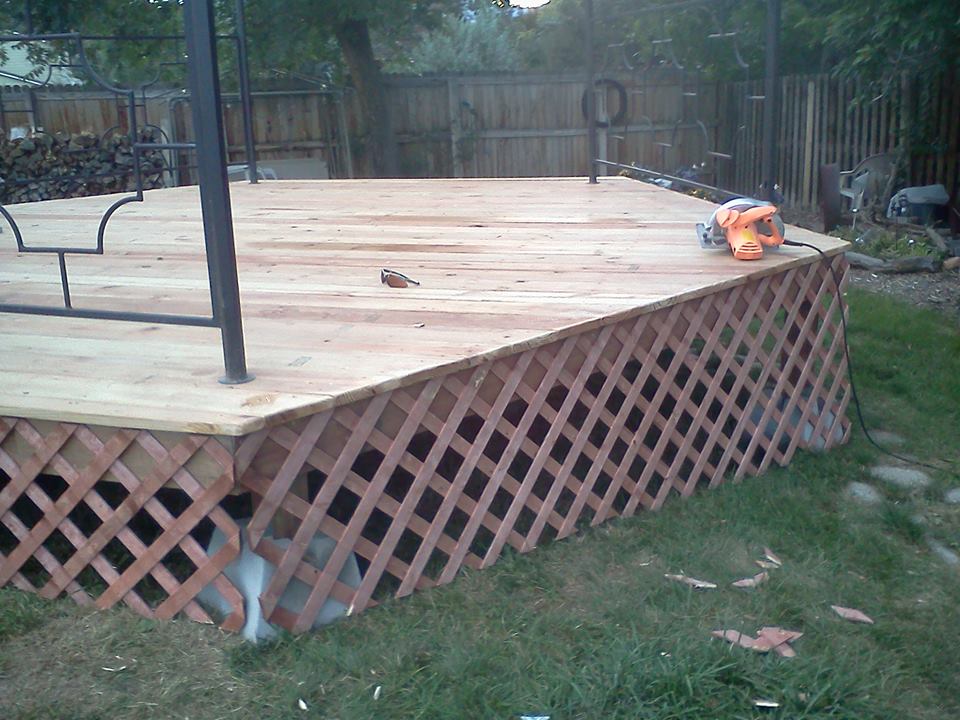
Nailing up the lattice for skirting. So far it has lasted quite well with stain. I may replace it with something else in the future when it breaks down.
Obviously I had to cut it to fit the contour of the yard.
Almost finished. After the appropriate time I sprayed a stain and water protection. The metal frame is screwed and bolted to the deck. Still need to figure out a roofing system. I added bracing and gussets to the metal frame where needed just to increase the rigidity for the roofing system. The metal frame is also weighted pretty heavy as in the next picture you will notice I added some cast iron decorative panels to fill in the bare spaces around the rear of the frame.
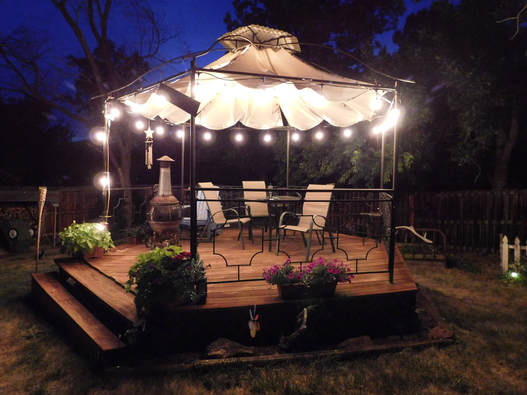
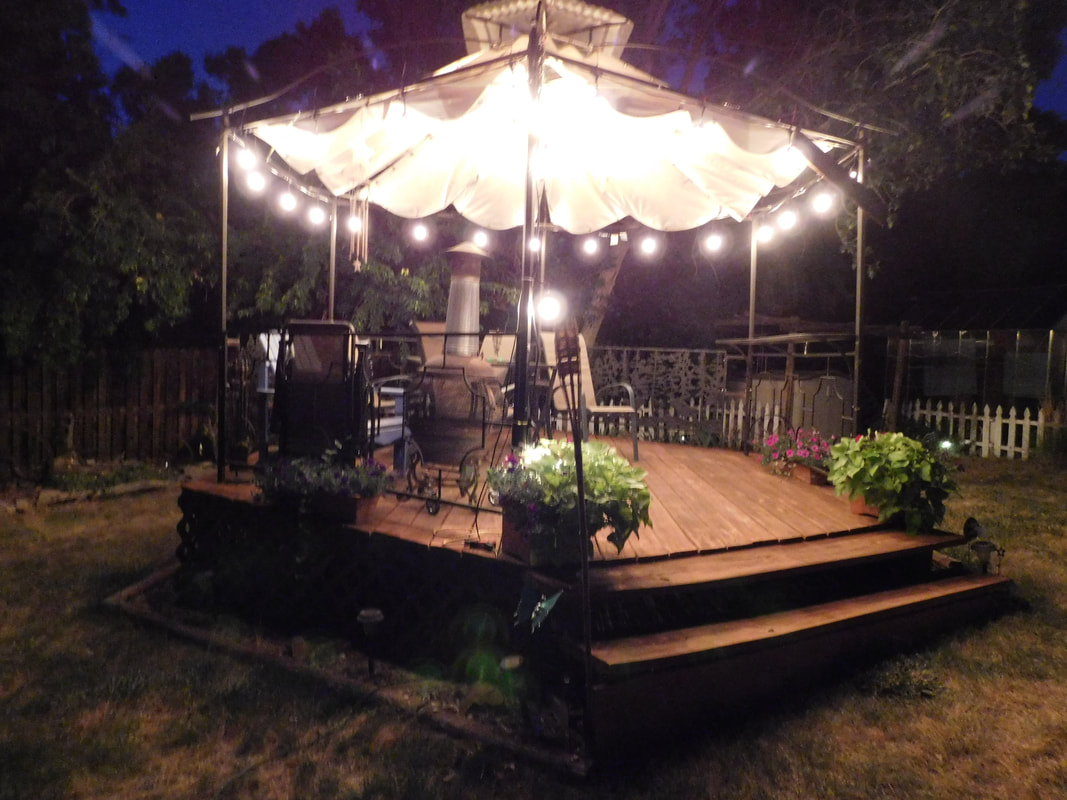
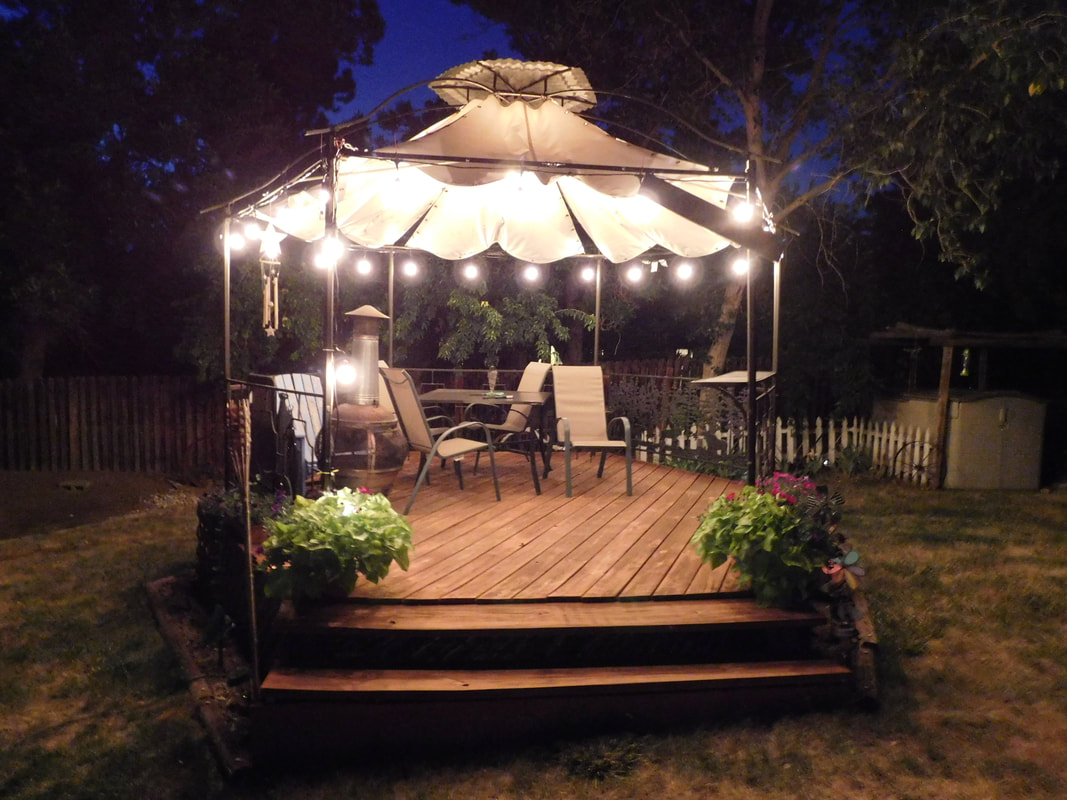
Pretty much finished. I made a top out of used corrugated sheet tin cut in triangles and sheet metal screwed to the existing frame. The large panels are custom sewn semi-trailer tarp material, very heavy and durable. Grommets installed and at the top and the bottom. Tarp panels attached via carabiner clamps at the top and ball stretch cords for the bottom. The elasticity of the ball cords allow for enough movement when things get windy. It has taken high winds like a champ.
What does a graphic designer do? Recently I got to ask that very question of the person that does all my design work for the graphics on this website. Watch the video below to see a very informative and insightful discussion about what graphic design is and how a designer can help you develop your brand.
Watch this presentation by Jodi Richey of Jodi Richey Design as she explains the in's and out's of how she goes about developing a message through graphics and text.
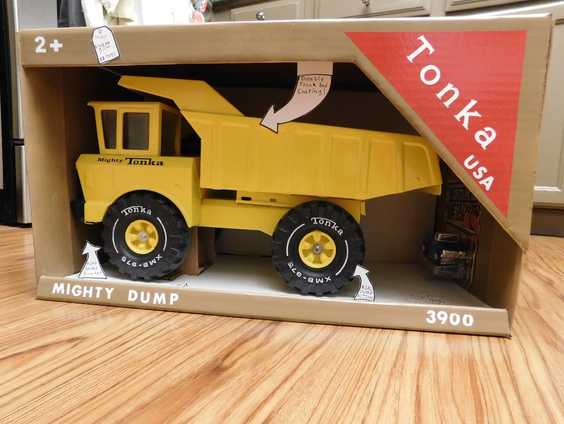
 The packaging I loosely replicated The packaging I loosely replicated
If you follow my projects that I post you saw me restore my own vintage Tonka Mighty Dump truck from start to finish. If you didn't catch that video and post you can CILCK HERE and see it all. This project focuses on making a vintage inspired box that replicates loosely what the original packaing would have been like. The truck in these pictures is another truck I restored to give as a gift. I wanted to make this gift extra special and make a custom box inspired by the original packaging. Below are pictures of the progress and loosely how I built it. I didn't really have a concrete plan when I started other than some reference photos from a GREAT site all about Tonka toys.
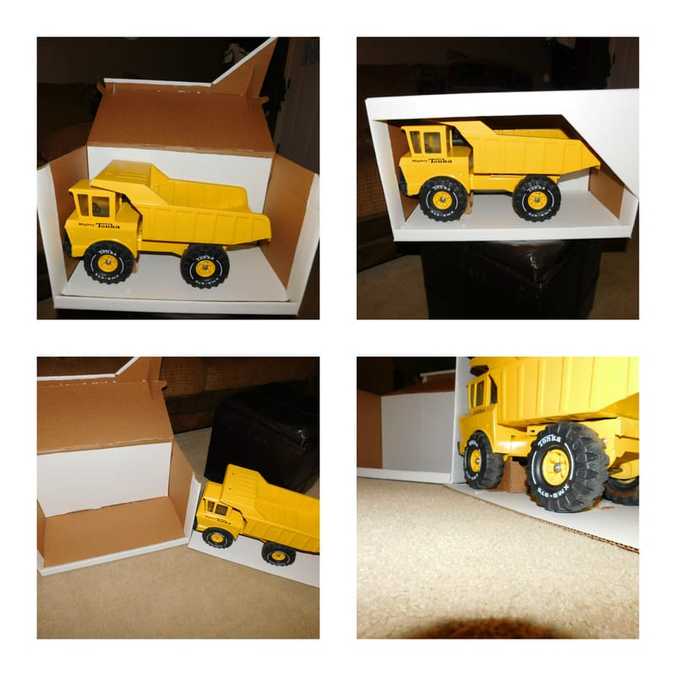
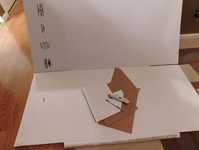 Cutting up a large cardboard box Cutting up a large cardboard box
As far as how I did made it, I started with a plain white box that was quite large. I set the truck down and measured around it for the rough size I wanted. Next I folded the bottom front where the labeling mighty dump would eventually go. I used my industrial glue gun (3M Polygun AE) and industrial grade glue sticks. To make folds easier I scored with a utility knife the first laer of cardboard. After satisfied with the look of the bottom I worked on the sides, measuriing for the height and the folding them up and in on themselves for a double wall look and finished front edge. After I was happy with the sides I worked on the back and top which are one piece with 3 folds. The front triangle pannel I eyeballed until it looked right and then folded about an 1 inch over on itself along the edge to create a smooth finished edge.
To hold the truck in I started with a flat base and created cardboard hooks that hold the axles front and rear. Painting and graphics were done simply with stick on letters to mask the white and then masking tape to mask the red after the brown had been sprayed. I may detail around the triangle in white (which I could have masked eariler but didn't know if I wanted to at the time) I added for that custom touch some arrows that point out the "features" of the toy. Vintage toys sometimes had these little identifiers. Well there you have it! My take on the retro box for a Tonka Mighty Dump truck. Making the box was almost as fun as restoring the truck!
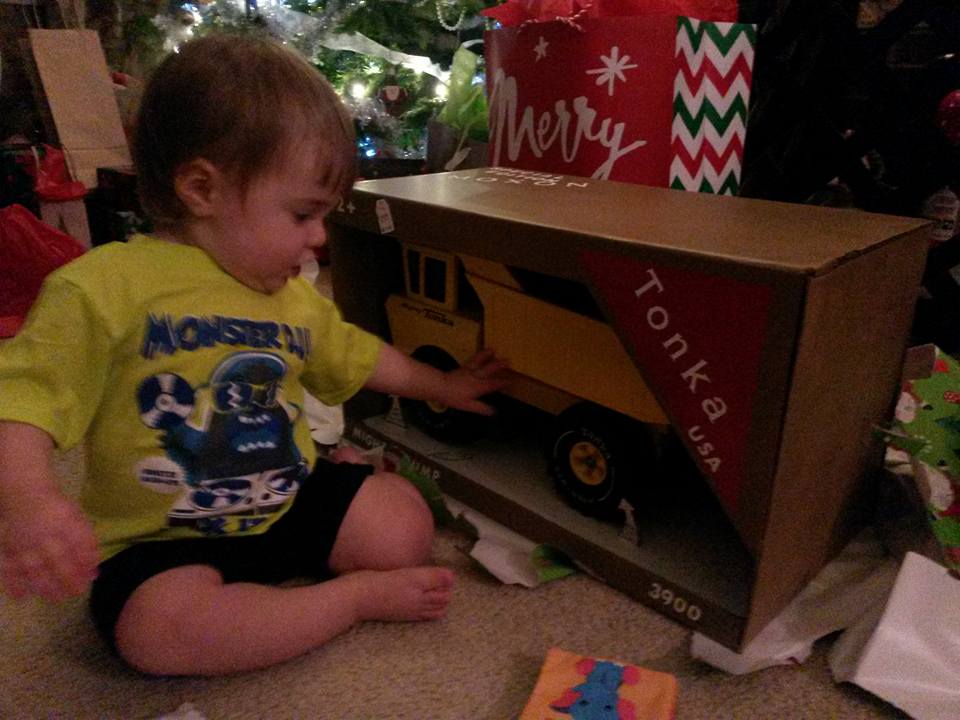
Opening the present on Christmas day!
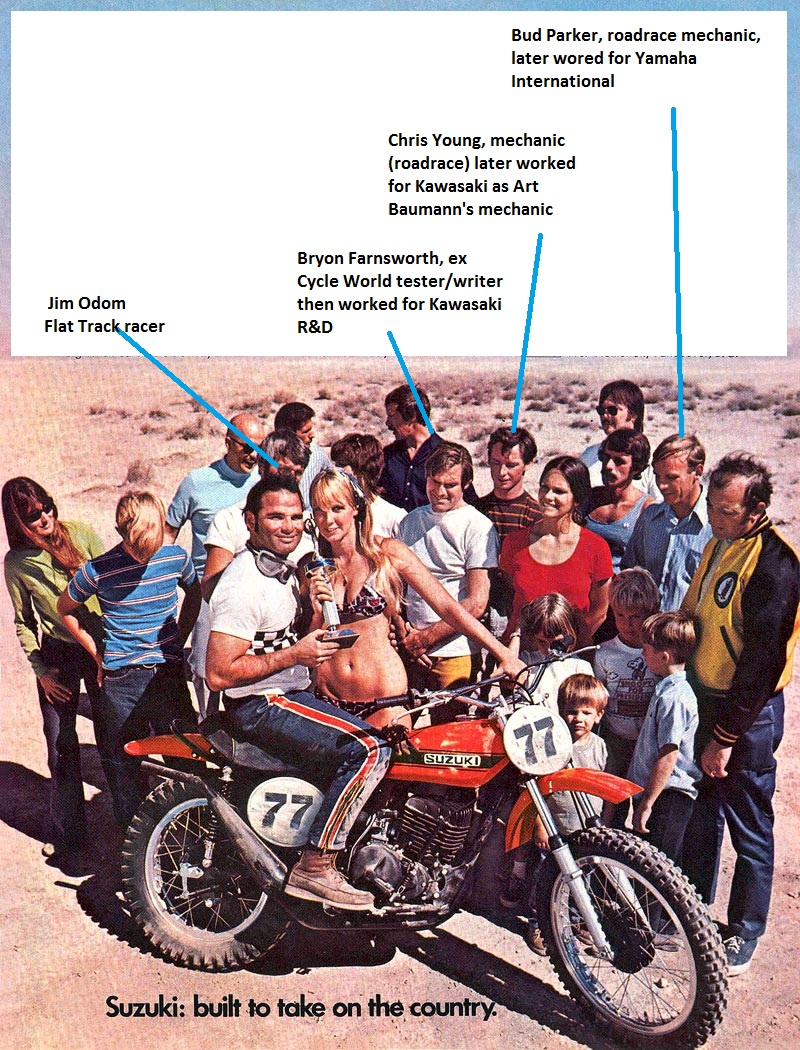
The Suzuki TM400, arguably the worst dirt bike of all time. It shows up on nearly everyone's list when asked the question and now has obtained almost legendary status and collectiblity because of this fact. And if you hoard vintage magazines from the 70's no doubt you have seen this ad, or even if you don't you have seen this ad floating around on the internet. You can google the history and controversy (on its handling and power delivery) if you want to know more about the bike itself. This post will center around the people within the ad itself. This info-graphic identifies some of the people that lined up for the Suzuki TM400 photo shoot. From extensive searching magazines, the internet, forums and talking with people here is the who's who in the ad.
I am looking to round out ALL the people in the ad if ever possible, so if you run across this post and know more information PLEASE contact me HERE my goal is to have a centralized place for people to find this info when searching about this bike, the Suzuki TM 400 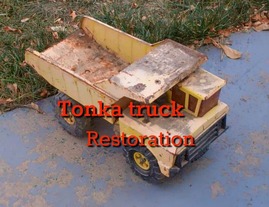
Restoring my childhood Tonka "Mighty Dump" truck for the next generation. Watch this step by step "how to" for restoring a Tonka toy truck.
I got all nostalgic whith my first born on the way and decided to dig some of my old toys out to restore. First one up is the good ole Tonka dump truck. It had been played with a lot and was looking a little worse for wear but still in great shape all things considered for a restoration. I saw the "new" ones in the store but sadly they are almost all plastic now with just the dump box being metal. Check out both videos to see the progress and the finished project. Watch Part 1 of the restoration below Scroll for Part 2 and the finished project Check out the Vintage inspired box I made!
Watch PART 2 and see how I finished the project!
 Real film, stop motion, film flicker, oh yeah! Real film, stop motion, film flicker, oh yeah!
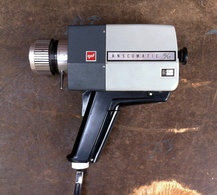
For those that know me know I have been pointing a motion picture type camera at something for a very long time. Starting with a GAF Super 8mm camera which my parents used to film themselves skiing in the 60's and 70's. Little did I know that I was Filming for the future, a future hobby on Youtube.
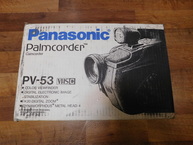
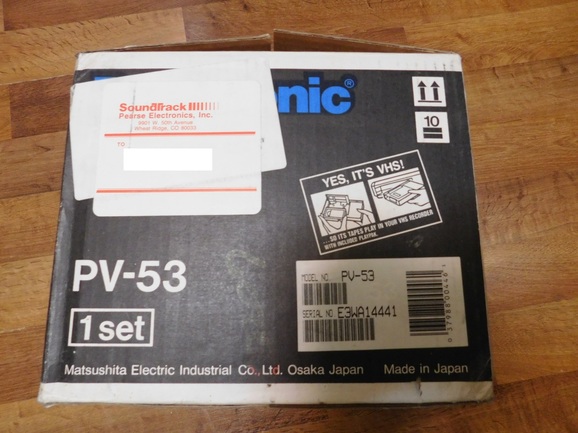
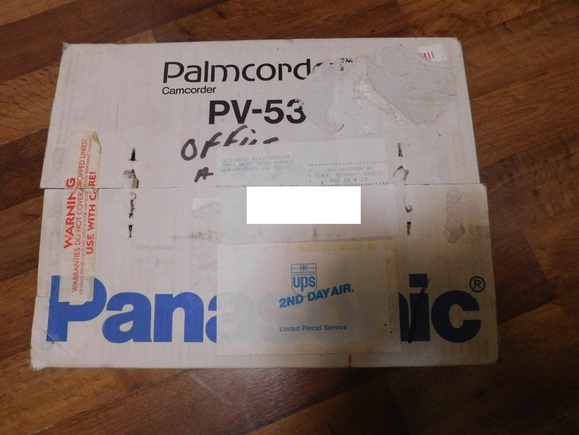
However, those types of cameras were not instant playback. I remember the days when I would shoot on 8mm film, 3 minutes at a time, that was the max mount of time on a roll of 8mm film, and then have to wait 3 weeks to get my masterpiece back, only to find some over exposure or blurriness. Enter the magnetic tape video recorder, or for most people, the VHS camcorder. My first VHS camcorder was the Panasonic Palmcorder PV53 that used VHSC (VHS compact) this was a smaller, lighter video camera. VHS Camcorders had been around for a good number of years before this thing came on the scene. Early camcorders were expensive and bulky but this was a more compact unit and maybe that was the tipping point for my parents to pull the trigger and get one. Even though prices were coming down from the $1500 price tags, this still probably set my folks back $700 and this is late 80's money. 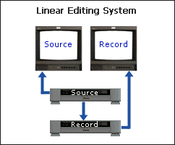 This was liner editing on VHS This was liner editing on VHS
Anyways, as you can see it was purchased from the now defunct SoundTrack Electronics (also known as Pearse Electronics in other states, and later Ultimate Electronics). This would become a Christmas present for the family, however I would get the most use out of it. If you peruse my YOUTUBE CHANNEL and go back in the archives or follow my retro video series you can see a tiny bit of things that I pointed this camera at. Back in the day I would do the two VCR method and use the left and right channel for different tracks of audio. It was tedious! But it was the only way I could do rudimentary video editing. Below is an example of that.
In addition to filming things around the farm, I also pointed it at my motorcycles, which in turn mean it got operated in a very dirty environment most of its life. After about 10 years of use the video quality degraded, presumably from dirt wearing on the drum and heads. Leaving video that looked like this...
Y2K!
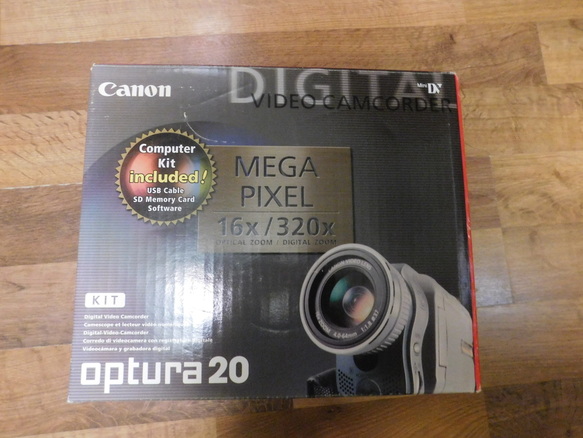
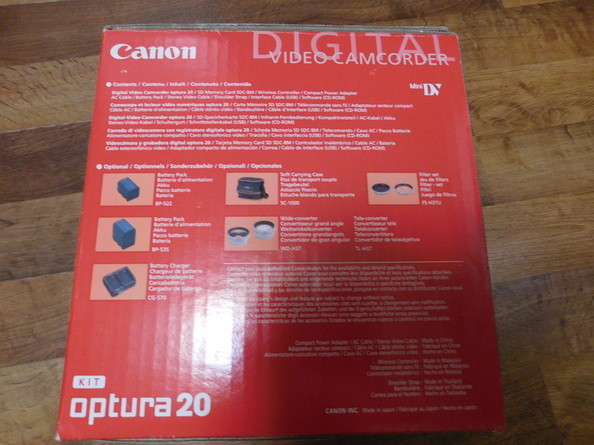
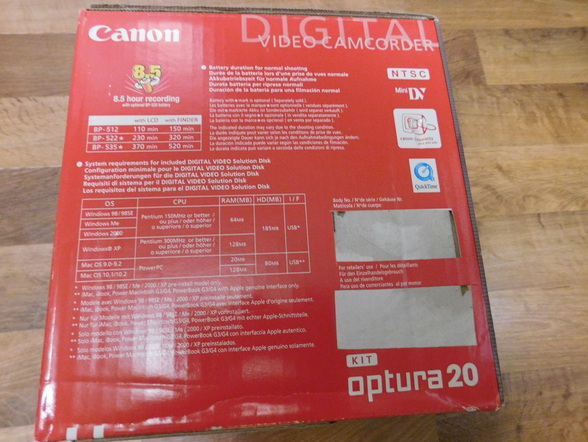
Enter the Cannon Optura 20, which was my first foray into digital video. MiniDV tapes was the format, a more accurate and robust media. It also recorded in then TV quality along with lots of manual adjustment features and stereo sound. The downside, at the time, is I didn't own a computer. I shot video with visions of being able to do non liner editing sometime in the future, just not at the time I had the camera. So I shot gigabytes worth of video that I am still combing through. I would own this camera 5 years before getting a computer with enough horsepower (read: good video card for rendering) and a firewire/IEEE 1394 (this is even before USB 2.0) port to do the transfer. Below is a good example of the types of video I shot with this camera.
And now in the present day we have flash media, multiple CCD sensors, high def and even 4K video cameras that can capture faster and faster FPS for ultra slo-mo even the most amateur video maker (me) can capture video of nearly anything that tickles their fancy. Couple that with more affordable computers that can do non-liner editing fairly easily, Youtube that make distribution of your video creation incredibly easy, and a viewer base hungry for on demand specialized content that they can search for. All this I never could see coming.
(Video is now Archived, click to watch the recorded stream) Join me on June 8th 8:00 PM central, 7:00 PM mountain for my very first LIVE STREAM event! As a thank you to all my Youtube subscribers I am hosting a live stream where you can ask me anything in the chat! I will discuss some pre-determined topics of interest to me, however I would really enjoy answering your questions LIVE. If this event is a success I may do future live streams. You can also watch the recorded stream right here in the embedded player below. So come join me!
The Bow Tie clamp from FastCap. Designed to hold or strap irregularly shaped items for storage or transport. Is it a product you can't live without? Or is it a product solving a problem no one was having? Check out the video review below.
If you are interested here is where you can buy the Bow Tie Clamp.
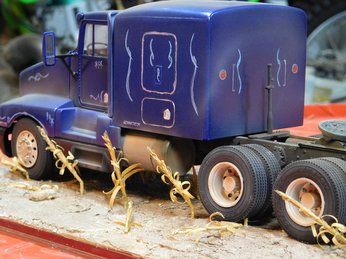
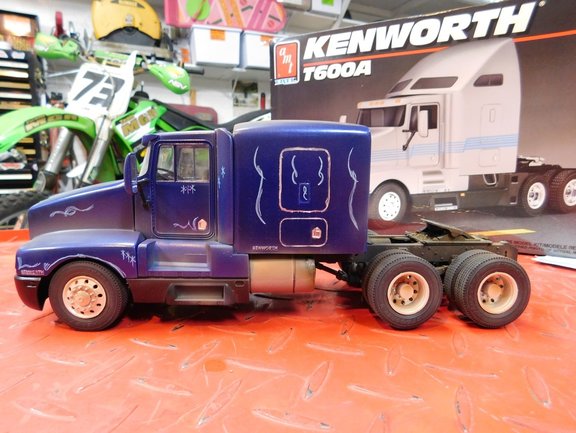
Just a quick update post with some pictures and video. Find out more about my 1/25th scale Kenworth T600 model project on my blog and Youtube channel. Below are some pictures of the progress. Converting the "aerodyne" style sleeper into a flattop sleeper just like the real thing. Body filler applied and curing to then be smoothed out for a proper roof line. The video explains more.
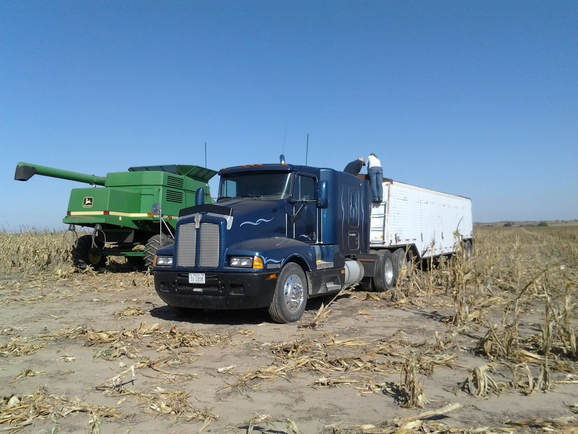
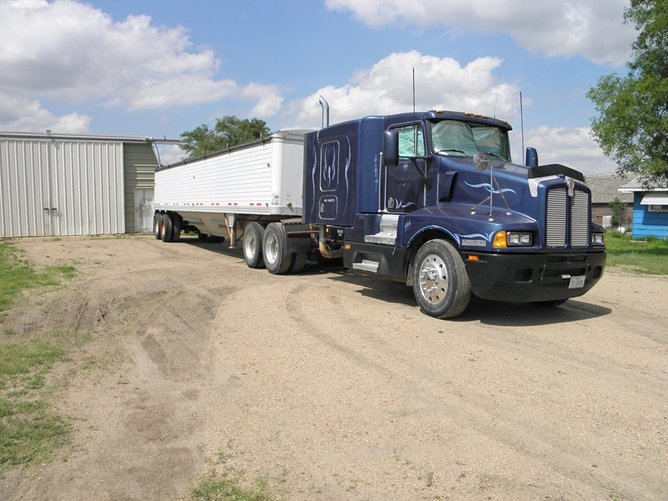
Well I have gotten a wild hare to build another model replica of another truck that is used on the FARM. If you had not seen the first build I did of a 1974 Kenworth W900 weathered to replicate the real thing, you might want to check it out here.
This time I am working on a replica of a 1994 Kenworth T600. Below are some videos that show some of the process and some 'how to" on weathering this model. There will be future postings on the progress. Stay tuned, but for now check out how I "rusted" the exhaust manifold and added some dirt and grime to the engine!
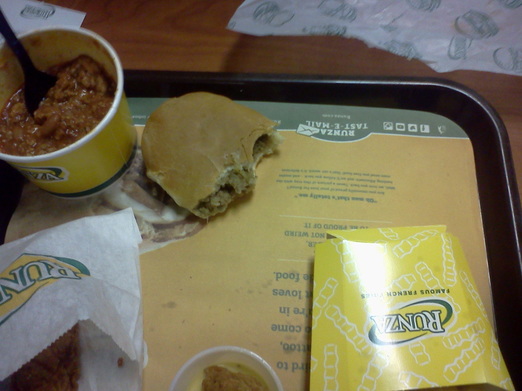
What is a Runza sandwich? Well watch this video and find out. Runza is famously a Nebraska favorite! If you are driving through Nebraska it is worth a stop at a Runza Restaurant.
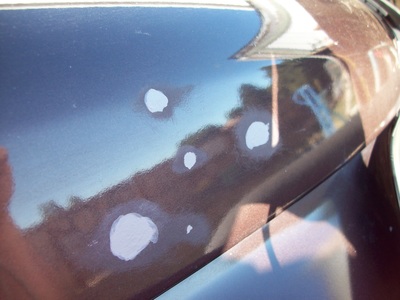
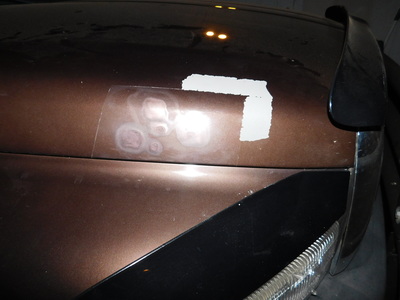
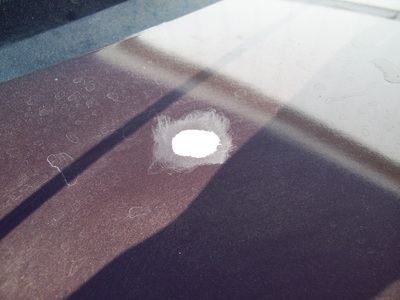
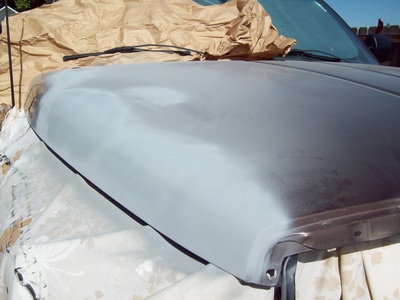
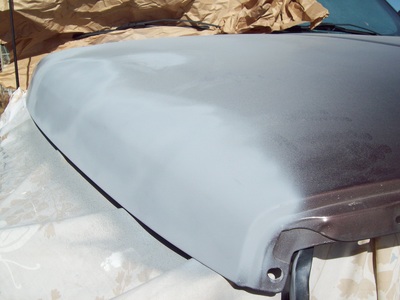
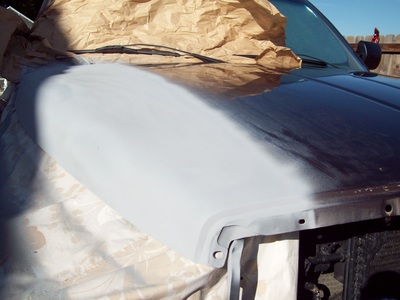
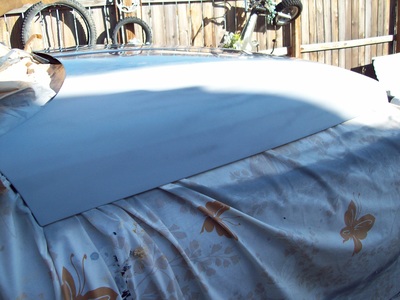
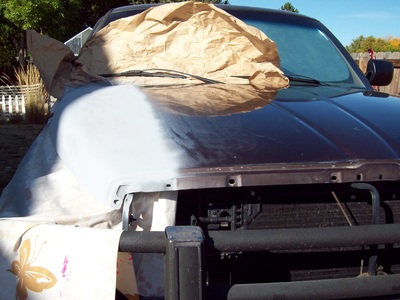
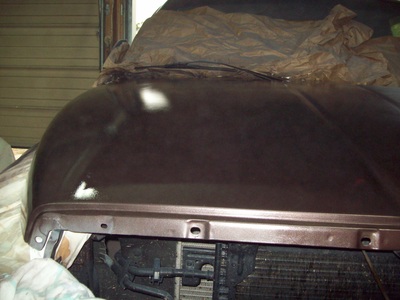
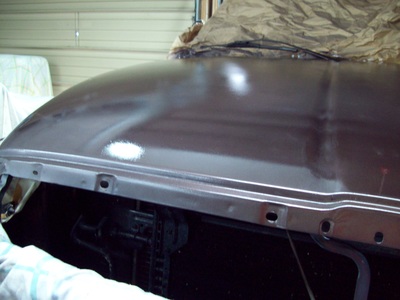
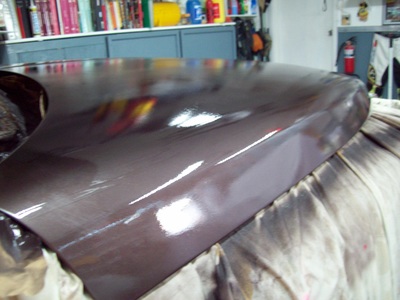
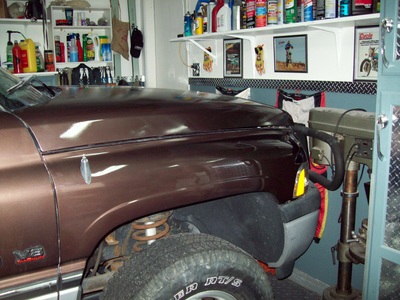
If you drive old junk like I do, you are bound to have a vehicle like this. Said vehicle is from the 90's or older and that old paint is chipping or falling off, in chunks if you own a 2nd Gen Dodge, Ford or Chevy of that era. In my case I choose to drive this old junk because I can't stand the thought of a vehicle owning me with a payment to the finance company every month. That monthly payment would take away funding for more motorcycle parts :) . Anyways, ye old Dodge was showing some paint cracking on the hood. Upon closer inspection the adhesive of the top coat had broken from the primer. The rest of the paint across the vehicle is fine nearly a scratch so it really wasn't ready for a complete respray, at least not yet. So a quick panel fix to keep the "good" paint from falling off and prevent rust until I am ready for said respray. Below are the "quick and dirty" process I did. You professionals out there might want to get the eye soap ready. Below are just a few of the major problems with the paint on this hood. These happened from a hail storm that broke the old brittle paint. After sanding back to "good" paint some filler primer was needed to get it smooth before the sealer primer. After the Primer sealer came the base coat of color and then a urethane clear for protection and to help blend the new and the old paint. It is not perfect nor show quality, but from 10 feet it looks just fine. Better than gray splotches of missing paint.
In the beginning before there was Youtube, I still made videos. Here is just a sample of what more there is to come. Subscribe for more updates! Be sure to check out my BEHIND THE SCENES page for more photos and videos.
|
Details
AuthorJon "the junk man" helping to promote responsible riding and recreation whether it be at the track or at the trail. Your source for motorcycle how to videos and much more! Archives
February 2023
|
Proudly powered by Weebly







 RSS Feed
